live streaming through an RTMP
Understanding Encoder Settings for Live Streaming
Encoder settings are pivotal configurations that enable the connection of a live video channel through any encoder compatible with the MojoCP video platform. These settings encompass essential parameters such as bitrate, resolution, codec, and other vital aspects crucial for a seamless broadcast onto the MojoCP platform. By carefully tailoring these encoder settings, you ensure that your live video stream is finely tuned for superior quality, optimal performance, and seamless compatibility within the MojoCP ecosystem.
Key Components of Encoder Settings
- Bitrate: This parameter determines the amount of data transmitted per second. Generally, a higher bitrate results in better video quality; however, it also requires more bandwidth. Conversely, a lower bitrate may save bandwidth but can lead to poorer quality. Therefore, choosing the right bitrate is essential to strike a balance between quality and network limitations.
- Resolution: Resolution significantly affects the clarity and detail of your video stream. Common resolutions include 720p (HD), 1080p (Full HD), and 4K. Your choice of resolution should consider your audience's viewing devices and the available bandwidth. Moreover, higher resolutions tend to enhance the viewer experience.
- Codec: The codec compresses and decompresses your video and audio streams. Popular codecs include H.264 for video and AAC for audio, which provide a good balance between quality and file size. Selecting the right codec is critical for ensuring smooth playback across various devices, thereby preventing interruptions during viewing.
- Frame Rate: This setting defines how many frames per second (fps) your video displays. Higher frame rates offer smoother motion, yet they require more processing power and bandwidth. Typically, frame rates of 30 fps are suitable for standard video, while 60 fps works best for high-action content.
Importance of Customizing Encoder Settings
Mastering these settings is integral to the smooth setup and successful broadcast of live video feeds through MojoCP. Not only do these configurations directly impact the quality of your stream, but they also influence viewer engagement. In fact, a well-optimized stream attracts and retains viewers, enhancing their overall experience.
Additionally, understanding and adjusting your encoder settings allows for adaptability. As network conditions fluctuate or audience preferences change, you can modify settings to maintain a consistent and enjoyable viewing experience. Whether you're streaming a live event, a webinar, or an online class, proper encoder configuration is crucial for delivering high-quality content that captivates your audience.
Conclusion
In summary, encoder settings play a vital role in the success of your live streaming endeavors. By optimizing these parameters, you can enhance video quality, improve performance, and ensure compatibility within the MojoCP ecosystem. Thus, take the time to familiarize yourself with these settings, as they are essential for delivering a professional and engaging live streaming experience.
RTMP Encoder Settings
Certain online platforms utilize RTMP servers such as Wowza and comparable services. These servers typically require user authentication through your designated username and password.
Generating a Stream File:
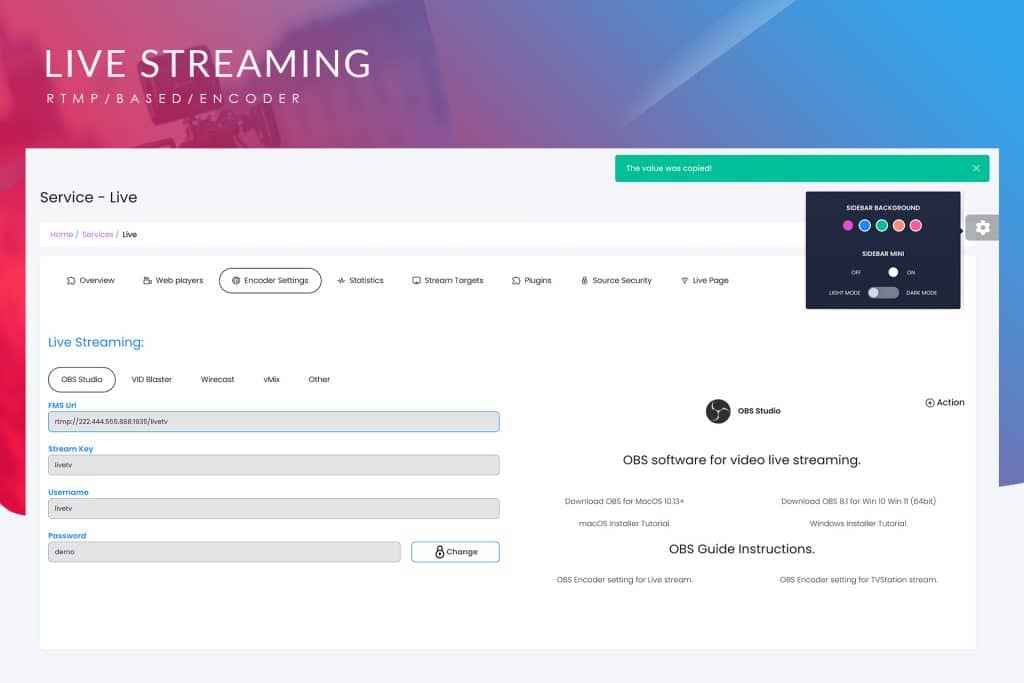
Navigate to the MojoCP dashboard and go to Services > Application name > Encoder Settings.
There are various encoder settings available for your live streaming, including options for software like OBS, VID Blaster, Wirecast, vMix, and also configurations optimized for streaming live content from mobile devices. (Let's illustrate this with OBS as our example.)
Open OBS Studio and from Mojocp copy and paste the information found in the Live Streaming box under the "Encoder Settings Tab" to your encoder.
It will resemble something similar to the following.
- FMS URL: rtmp://222.444.555.888:1935/livetv
- Stream Key: livetv
- Username: livetv
- Password: demo
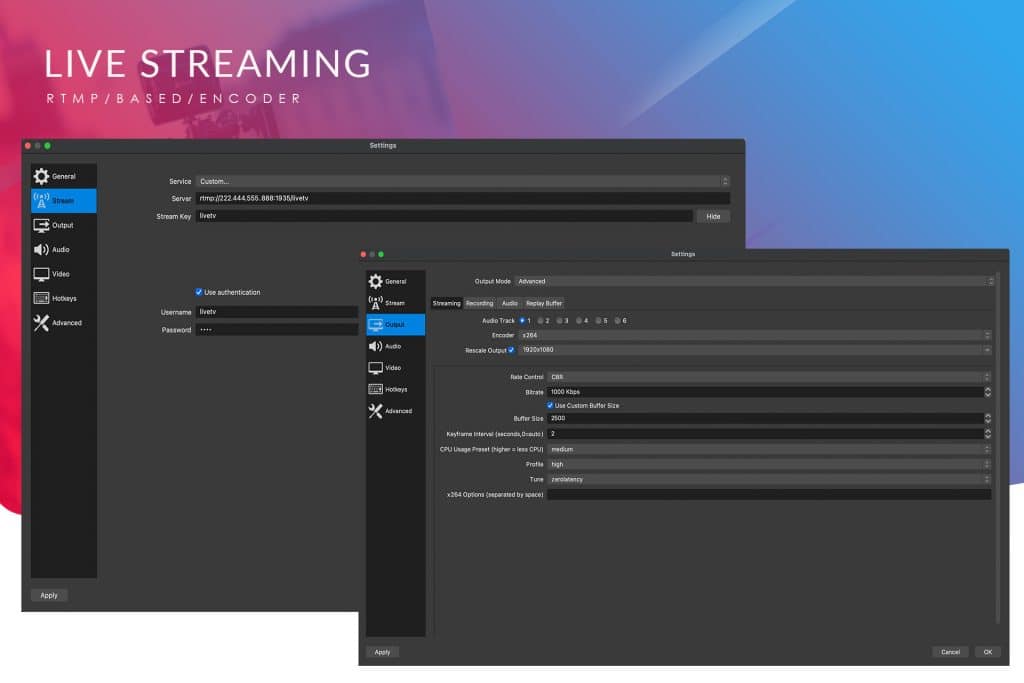
In OBS, navigate to 'Output' located on your left screen:
- Output mode: Select 'Advanced.'
- Encoder: Choose 'x264.'
- Rate Control: Set to 'CBR.'
- Bitrate: Adjust this based on your stream plan; you can also find this information on the Overview page in MojoCP.
- Buffering: Set to '2500.'
- Keyframe Interval: Optimal settings range from 1 to 2.
- CPU Usage: Set to 'Medium.'
- Profile: Select 'High.'
- Tune: Choose 'Zerolatency.'
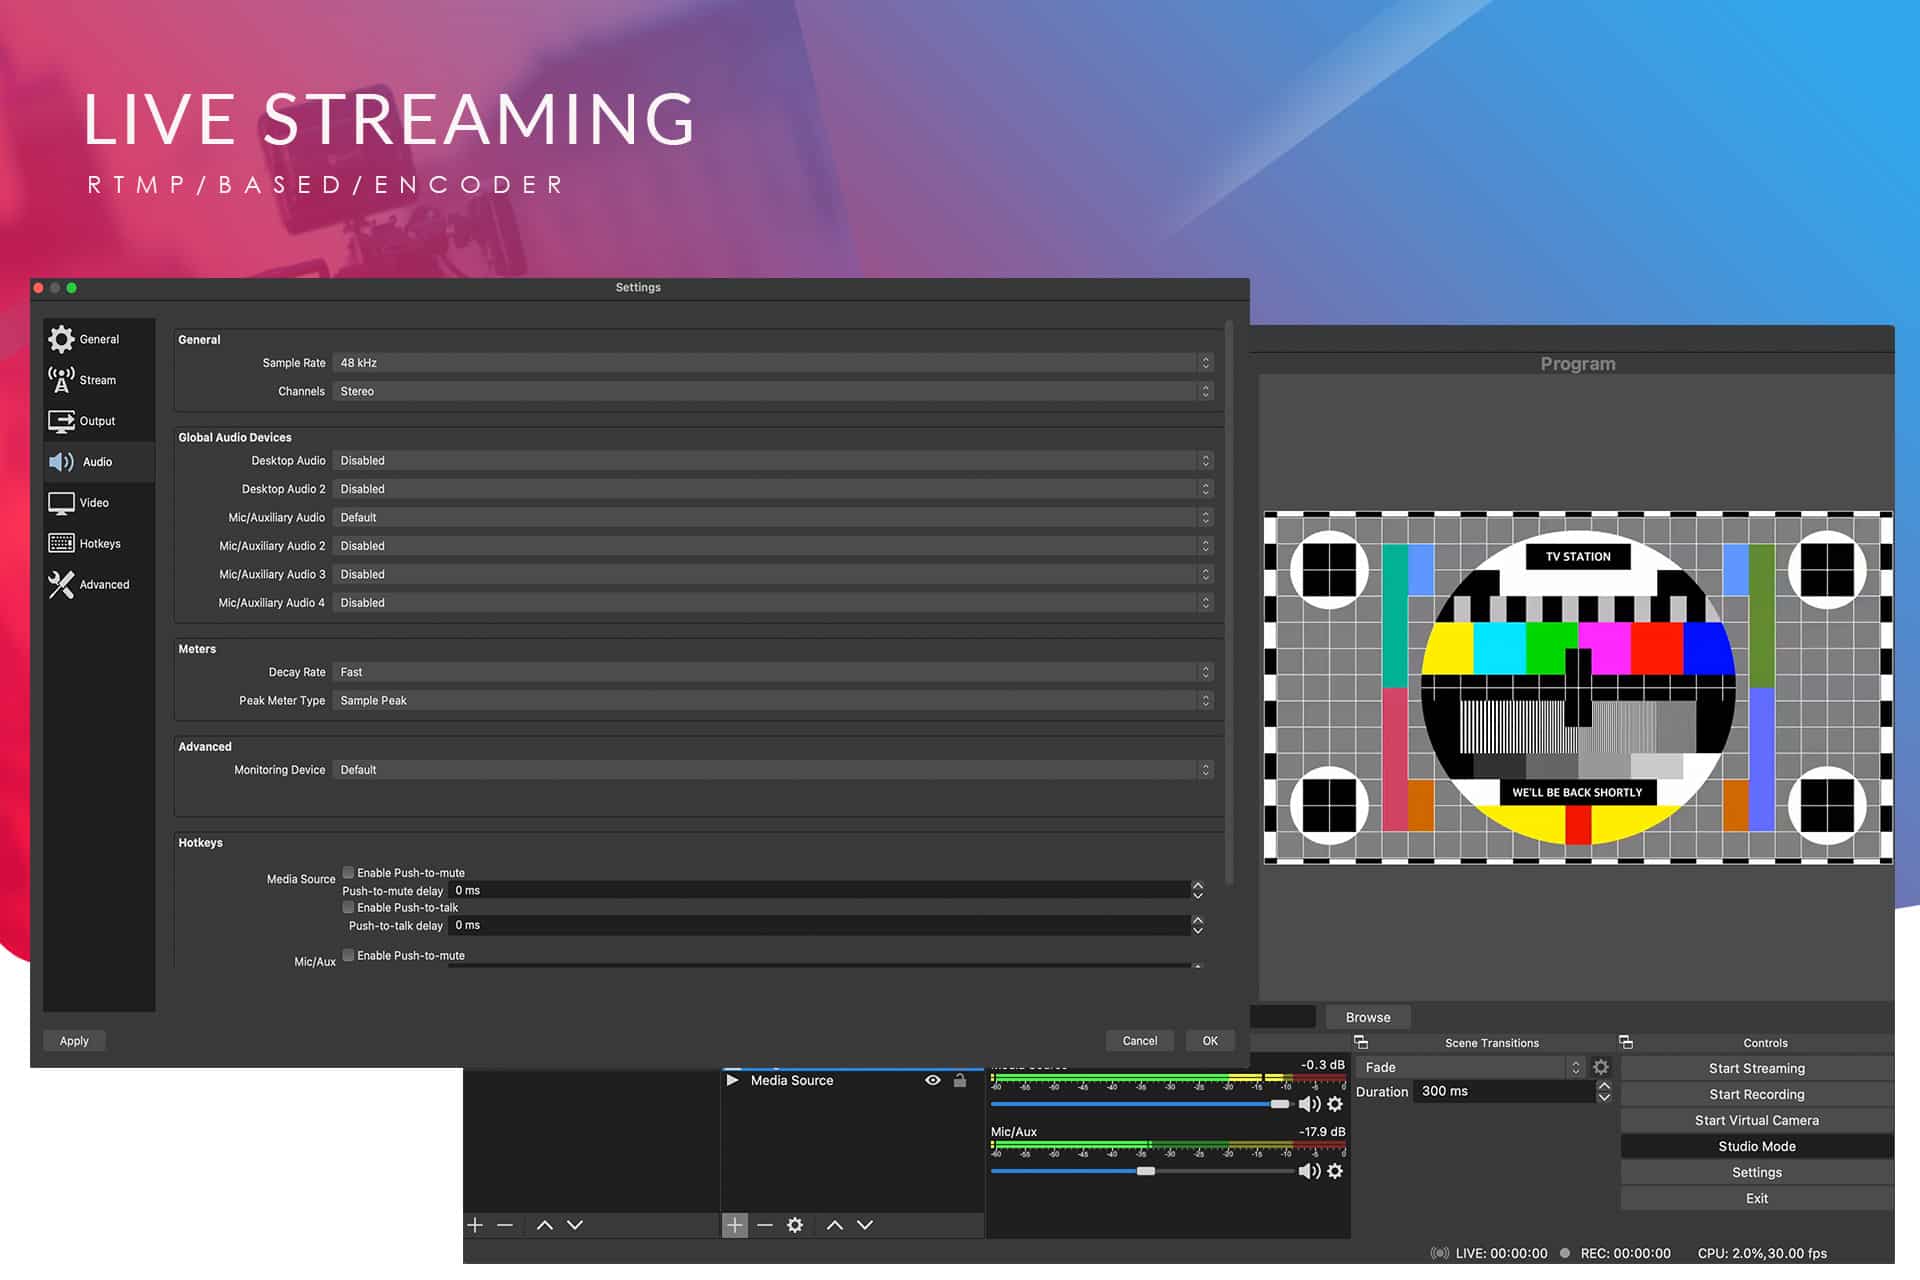
Next, move to the 'Audio' tab in OBS under 'General' and configure as follows:
- Sample Rate: Set to '48 kHz.'
- Channels: Choose 'Stereo.'
Click 'Apply' and then 'OK' to save the changes. You're now prepared to commence YOUR live streaming by clicking 'Start Streaming' in OBS."
*Please consult the accompanying screenshot for reference.
- Streaming Pulse Inc.
Click to zoom in on the image
Download OBS Studio
Free and open source software for video recording and live streaming.
- Windows 10 and 11: Download Installer
- macOS 11.0 : Installer (x86_64/Intel)
- Ubuntu 20.04 and newer: obsproject
- Linux Manual Install: Setup Guide
Quick-Reference Guide
Discover the Power of Open Broadcaster Software (OBS) Studio: Learn How to Create RTMP-Based Live Video Streams.


