XSplit Broadcaster:
Unlock the Full Potential of Live Streaming:
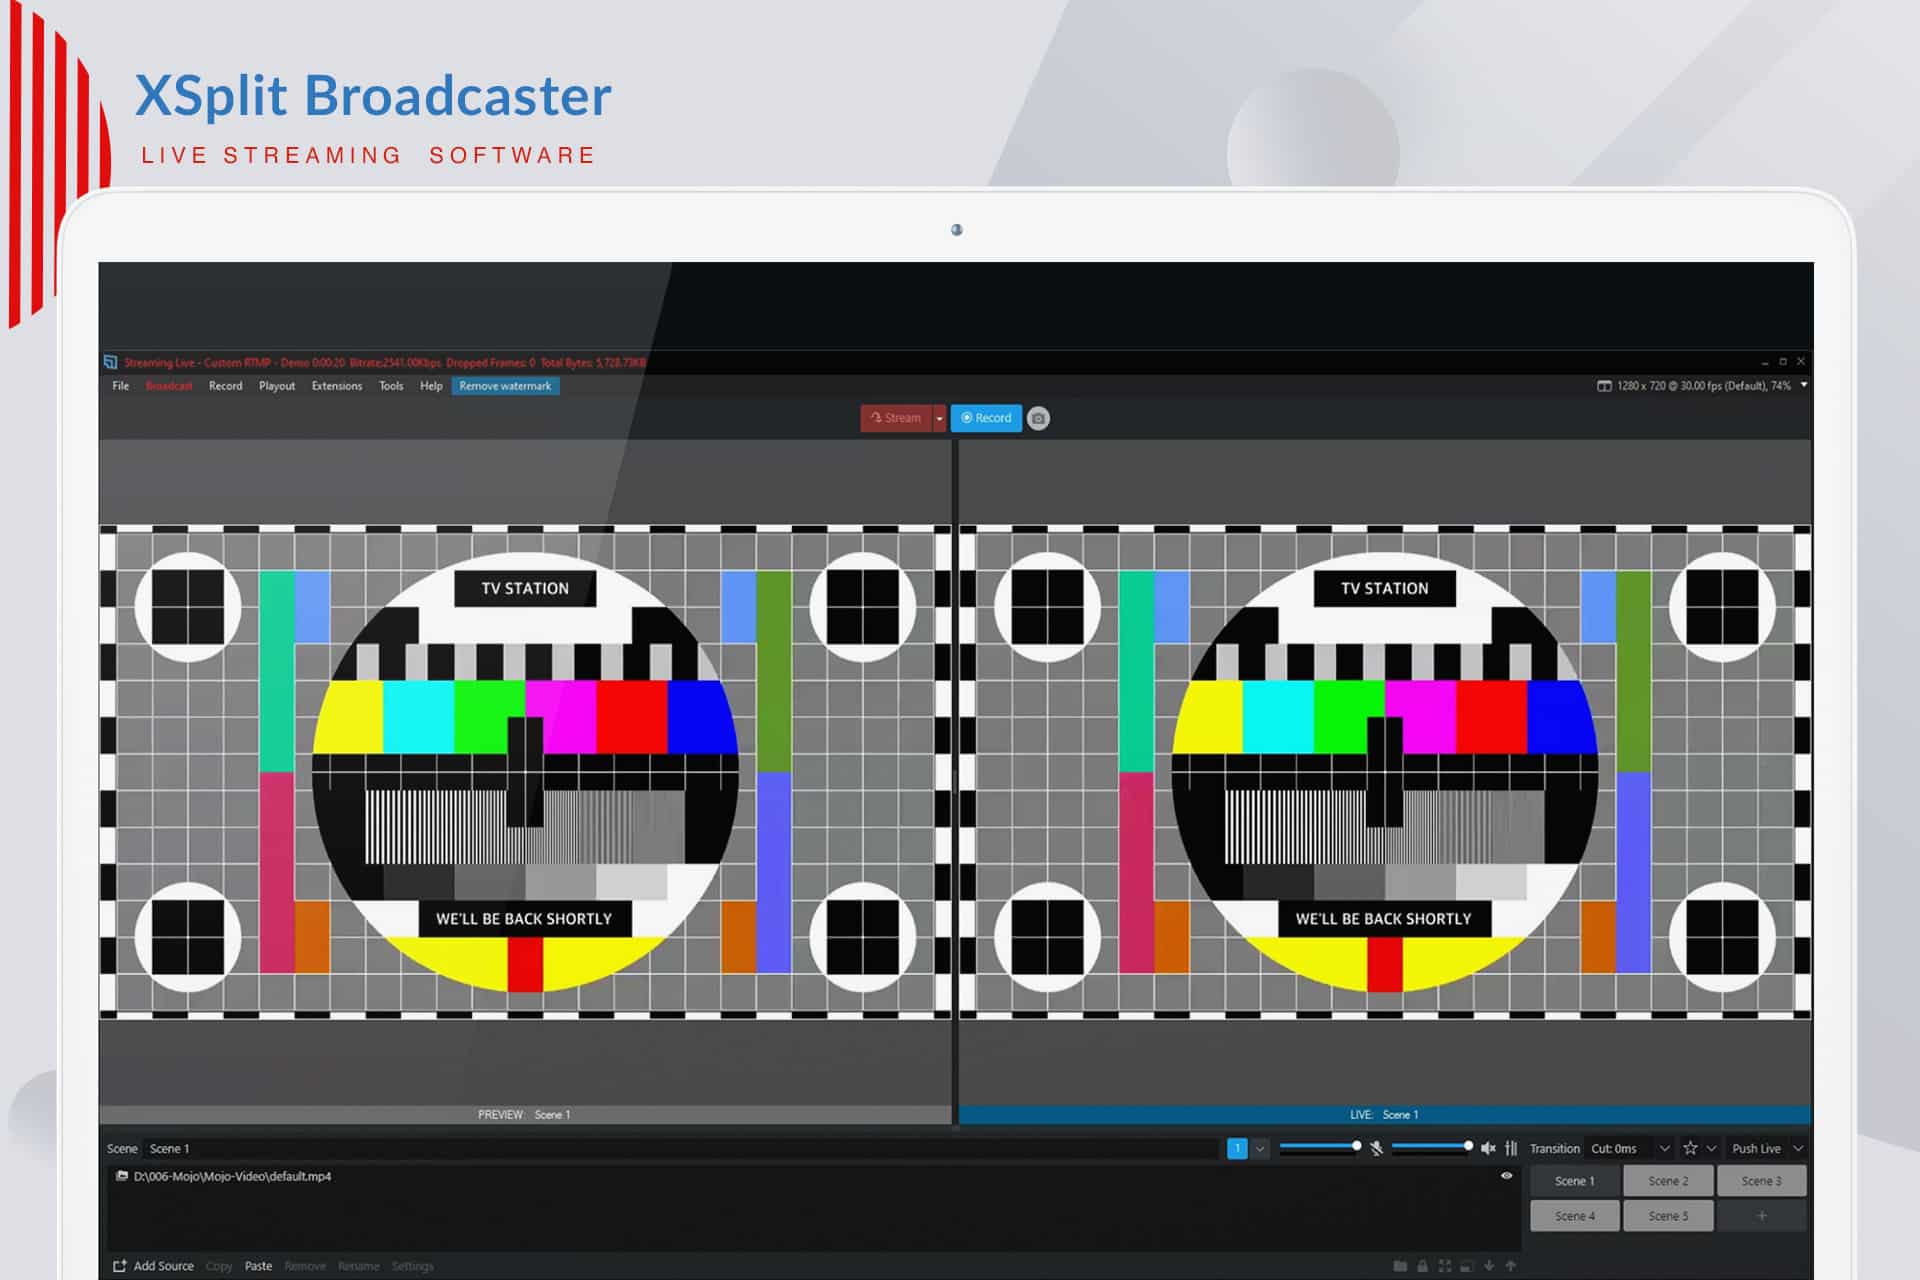
XSplit Broadcaster is a powerful and versatile software designed for professional live streaming and video production. With its user-friendly interface and robust features, you can create high-quality broadcasts effortlessly. Whether you are streaming gaming sessions, webinars, or any other live events, this tool has you covered.
Key Features:
- Versatile Scene Management
First and foremost, one of the standout features is its versatile scene management. You can easily switch between different scenes during your broadcast, allowing for dynamic presentations. This feature is particularly useful for live events where you may want to showcase various content, such as gameplay, slideshows, or guest appearances. - Real-Time Mixing
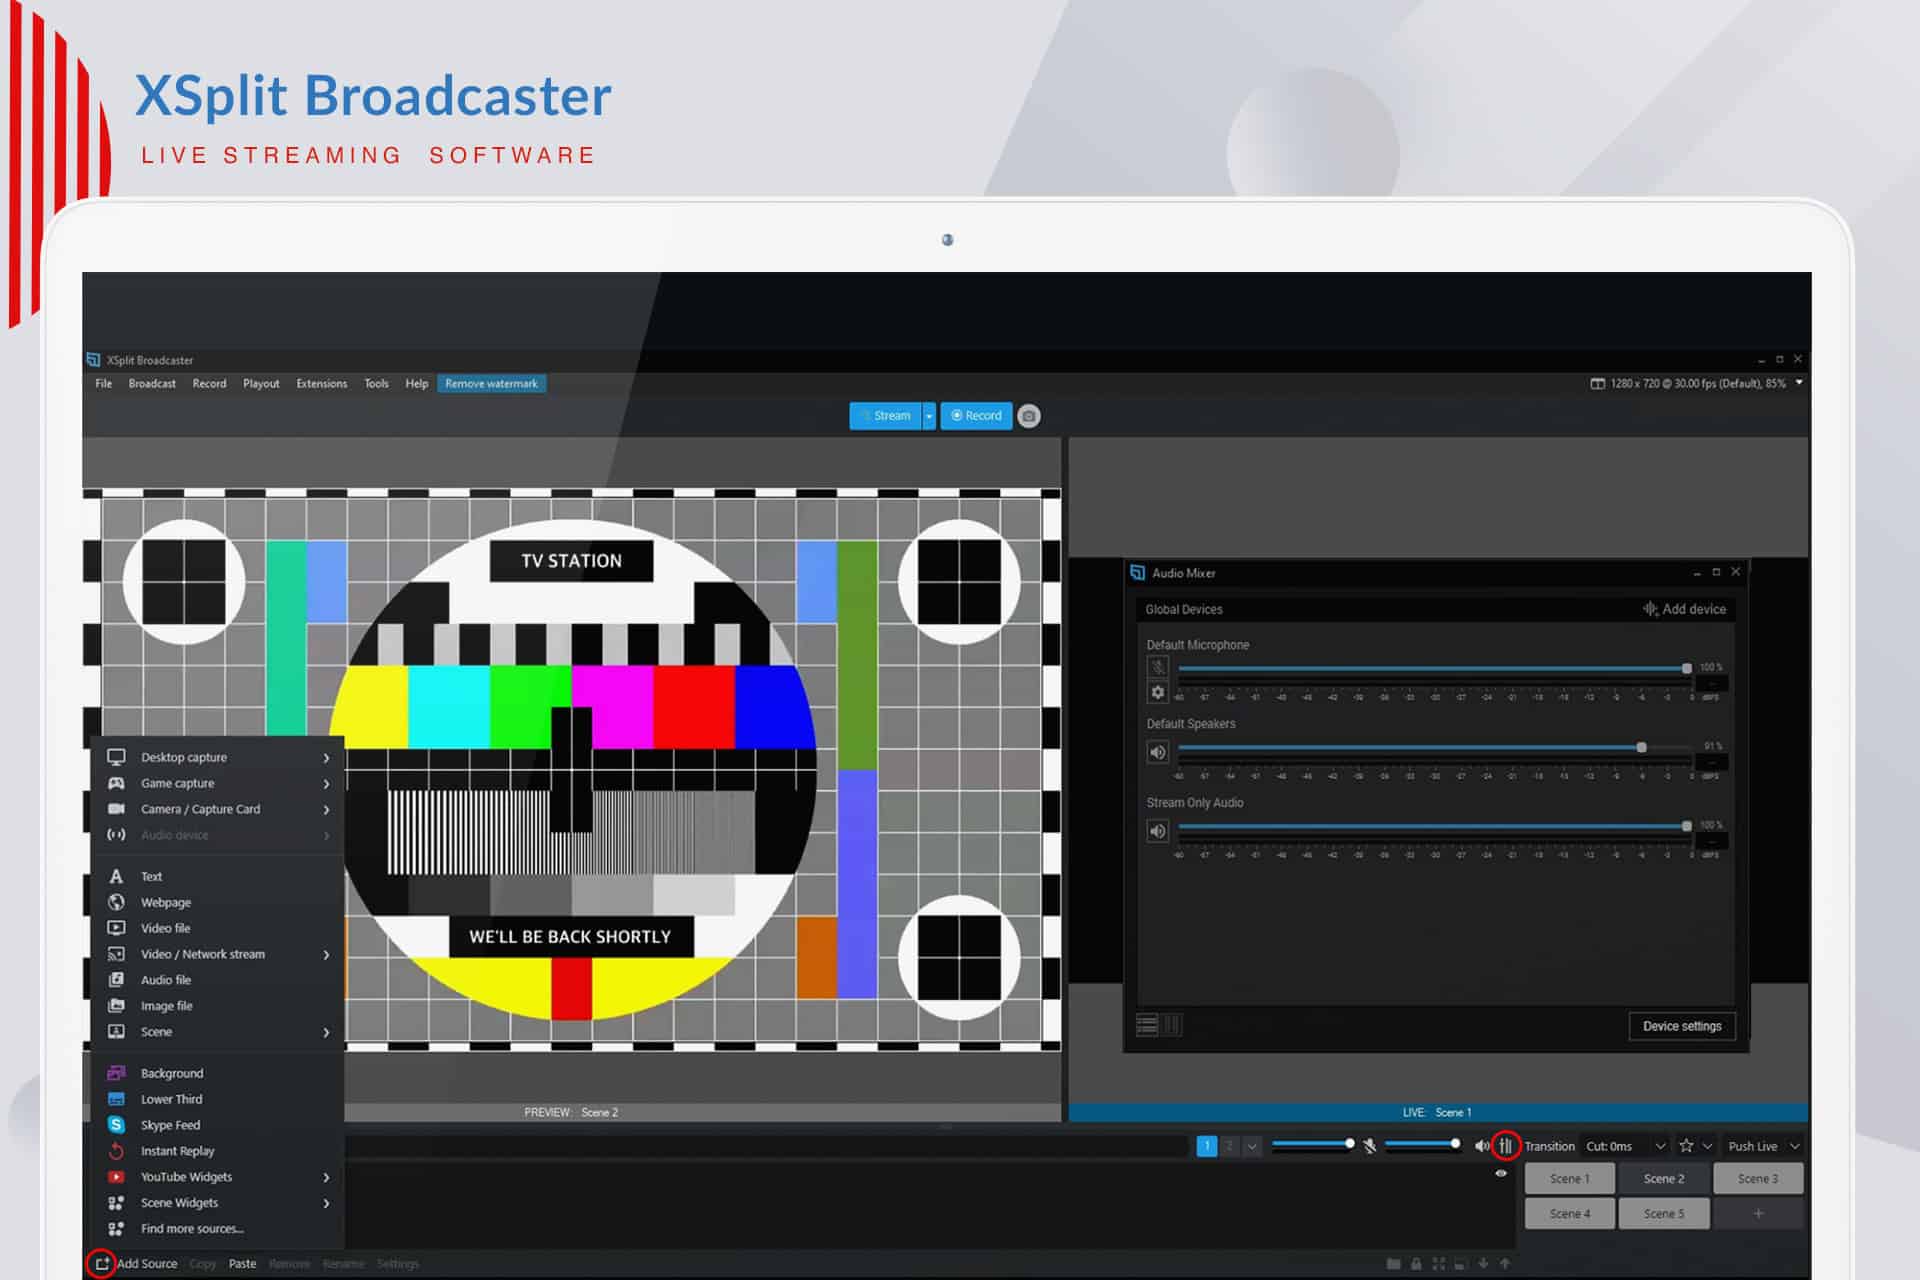
Additionally, XSplit offers real-time audio and video mixing capabilities. You can adjust audio levels, apply filters, and mix multiple video sources on the fly. As a result, your audience will experience high-quality audio and visuals throughout your stream. - Interactive Streaming Tools
Moreover, engage your audience with interactive streaming tools. This software allows you to integrate chat overlays, alerts, and polls into your broadcasts. By incorporating these features, you create an interactive experience that fosters a stronger connection with your viewers. - Seamless Integration
Furthermore, the program seamlessly integrates with popular streaming platforms like Twitch, YouTube, and Facebook Live. This makes it easy to reach your audience wherever they are. In addition, you can customize your stream settings to optimize performance and quality based on your internet connection. - Customizable Layouts
Finally, create stunning layouts for your stream with customizable templates. You can add logos, images, and text to make your broadcasts stand out. This personalization not only helps reinforce your brand identity but also makes your streams visually appealing.
In Summary:
In conclusion, XSplit Broadcaster is an essential tool for anyone looking to elevate their live streaming experience. With advanced features, a user-friendly design, and integration capabilities, it empowers creators to deliver professional-quality content. Whether you are a seasoned broadcaster or just starting out, this software provides the tools you need to succeed in the world of live streaming.
Click to zoom in on the image
Essential Encoder Configuration
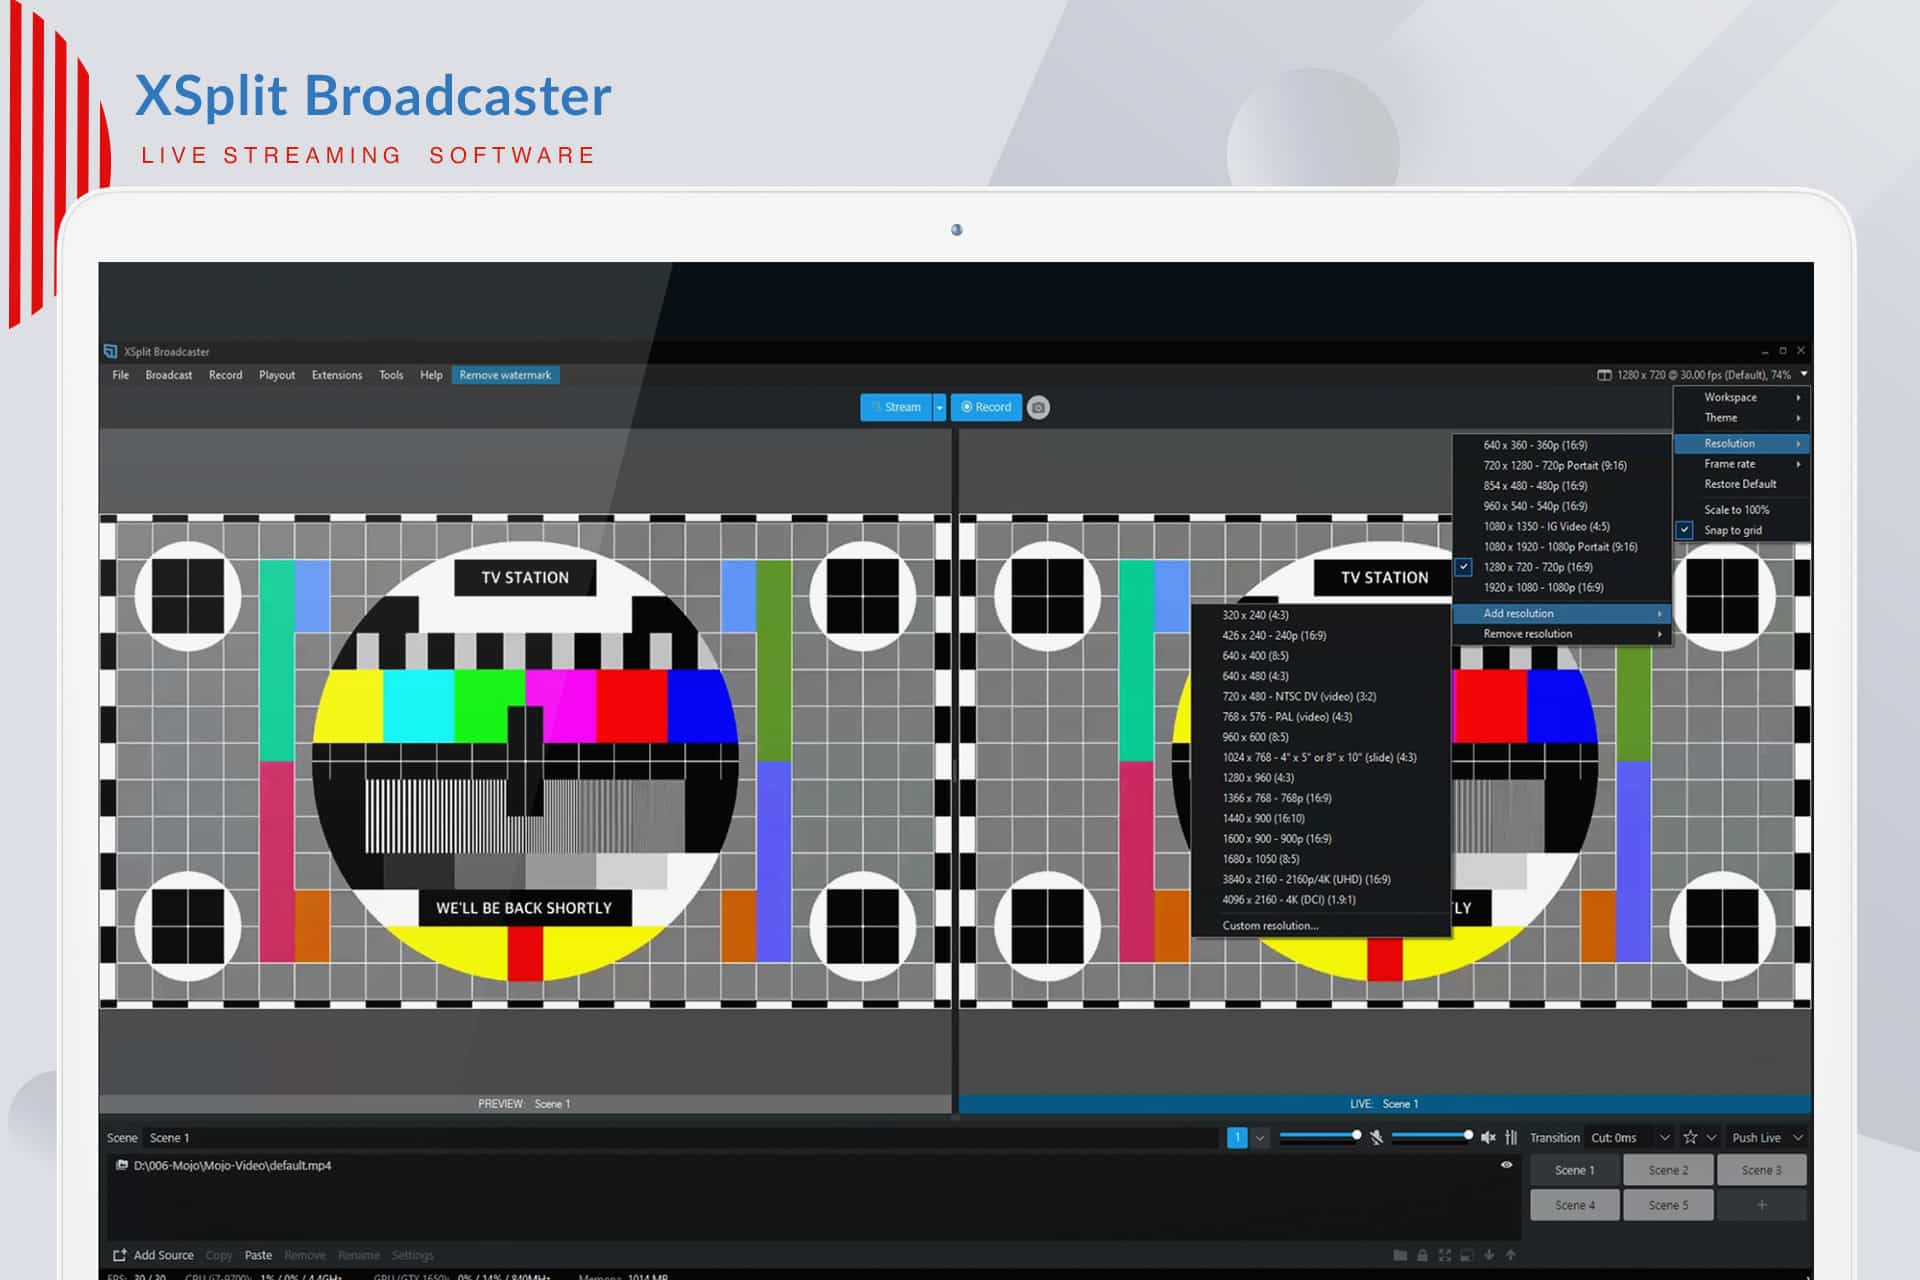
To ensure a seamless live streaming experience with StreamingPulse, it's imperative to adhere to the following encoder settings. These settings are universal, catering to various resolutions and bitrates to guarantee optimal performance:
Video Codec: H.264 (x264 is also compatible)
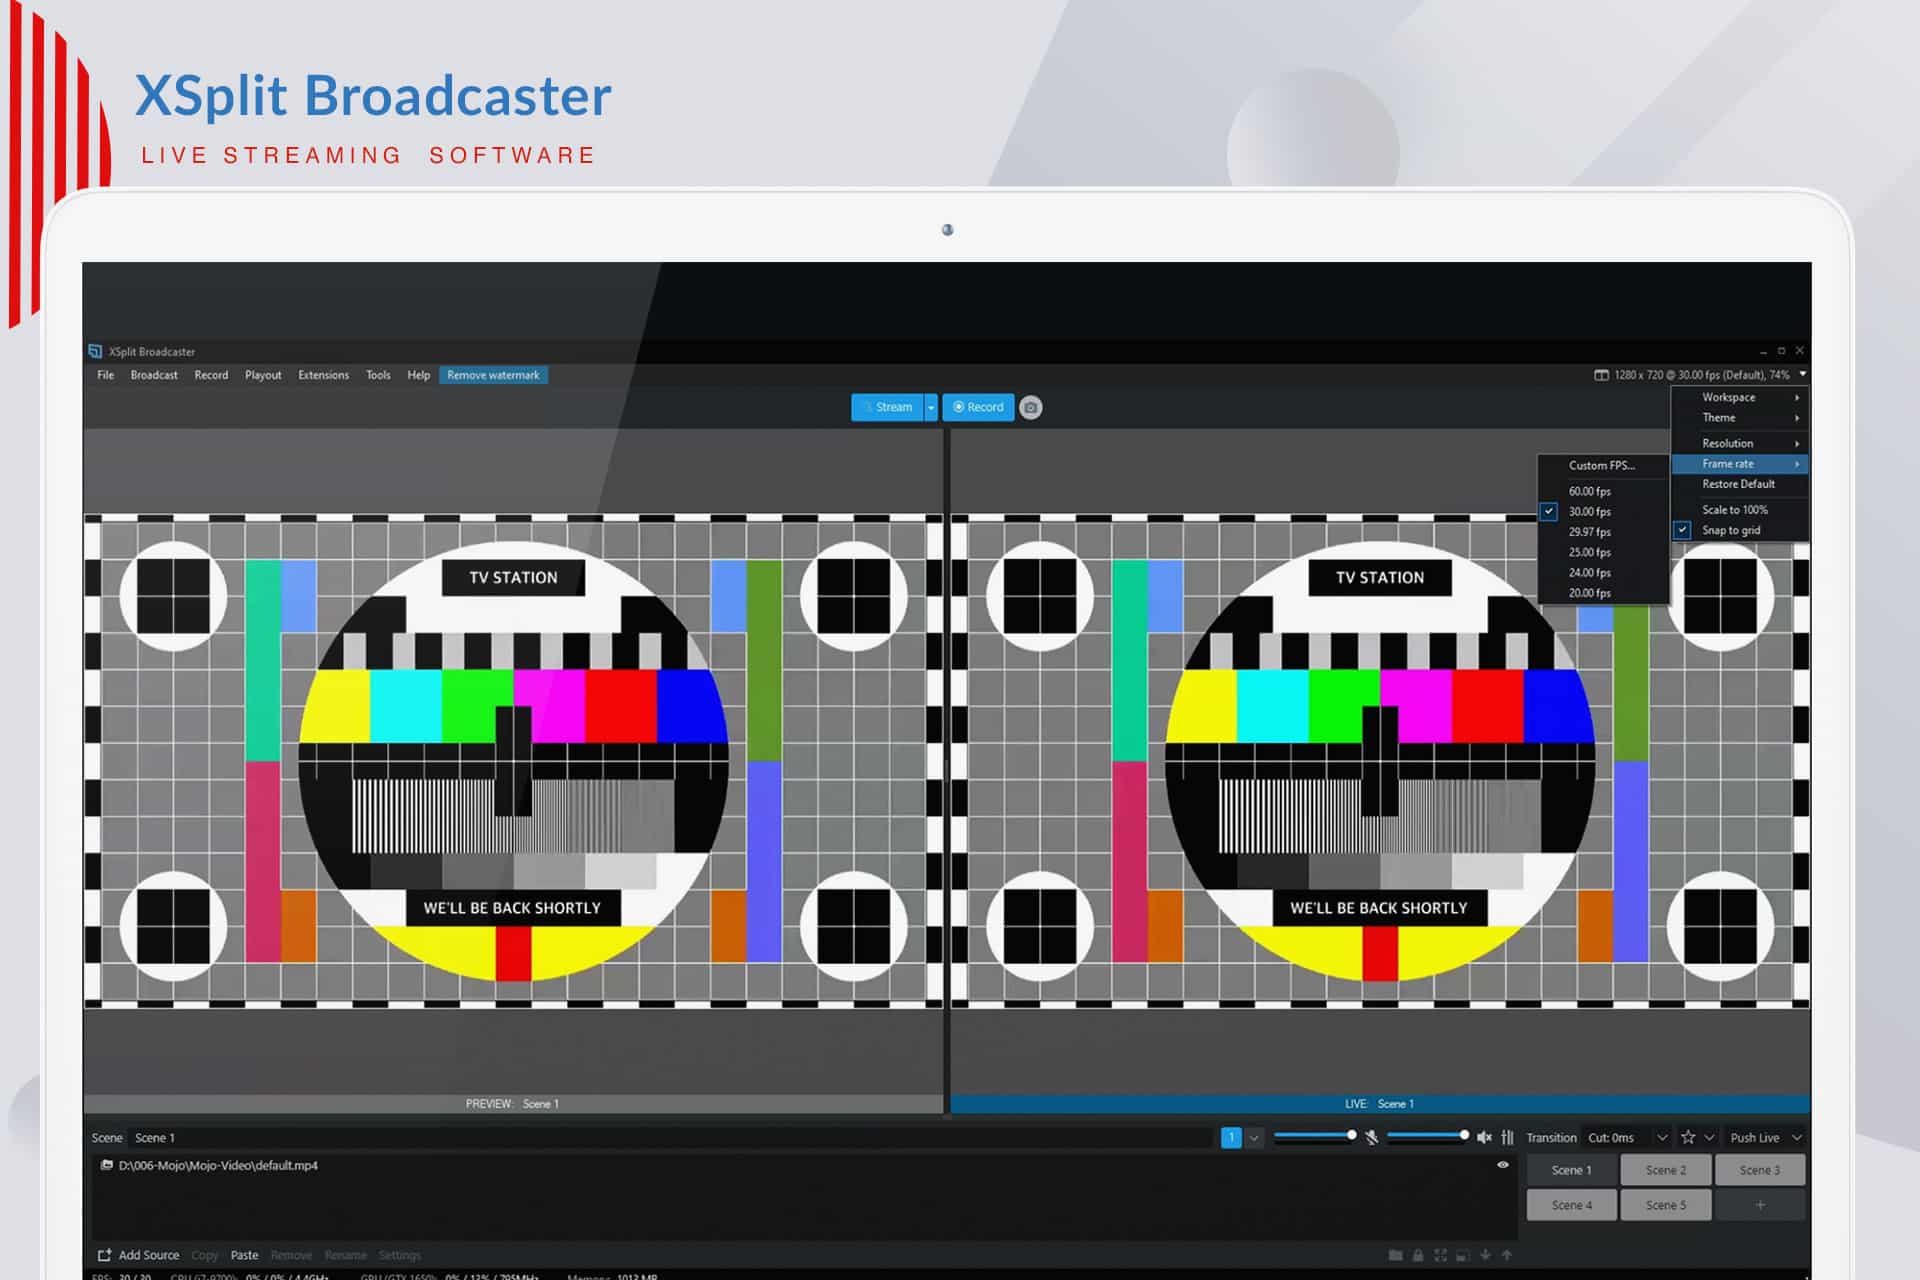
Frame Rate: 25 or 30 frames per second (World standard definition: 25fps / 50fps)
Keyframe Interval: 2 seconds (Please use a keyframe frequency of 2 seconds or less.)
Scanning: Progressive
Encoding Bitrate: Constant (CBR)
Audio Codec: AAC
Audio Bitrate: 128 kbps
Audio Channels: 2 (Stereo)
Audio Sample Rate: 48 kHz (48,000 Hz)Live Stream with a Custom RTMP Server Method
XSplit Broadcaster seamlessly integrates with the Windows operating system, providing robust features such as multistreaming, audio volume management, and high video quality.
Step 1:
Initiate the process by navigating to the MojoCP Platform's "Services" menu from your dashboard. Select the designated server to streamline your setup.
Step 2:
Proceed to the Encoder Settings Tab and choose "Other" for XSplit Broadcaster.
Step 3:
Copy and paste the Live streaming information for your XSplit Broadcaster, including FMS Url, Stream Key, Username, and Password.It will resemble something similar to the following.
- FMS URL: rtmp://141.91.218.32:1935/livetv
- Stream Key: livetv
- Username: livetv
- Password: demo
Step 4:
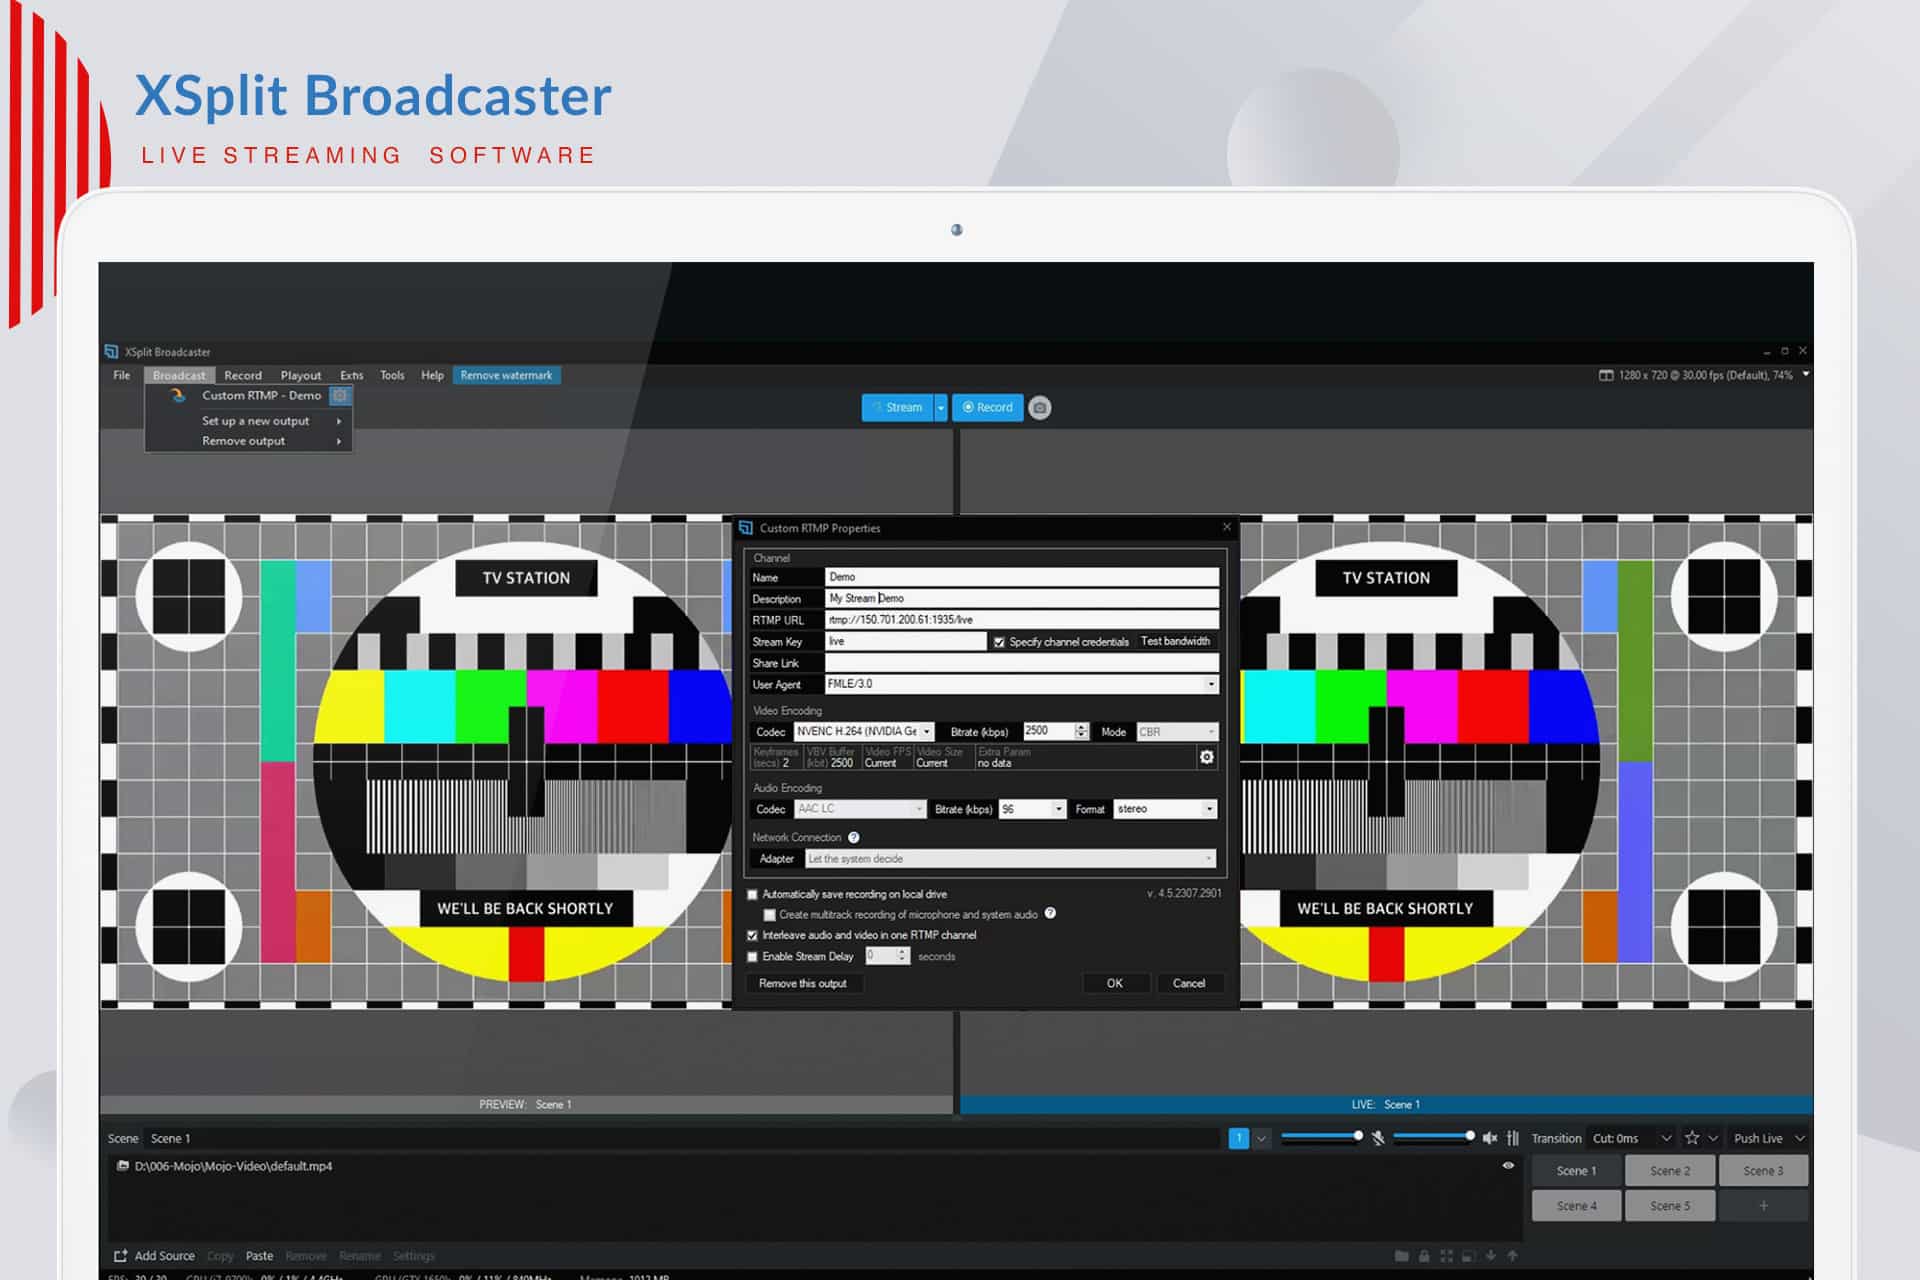
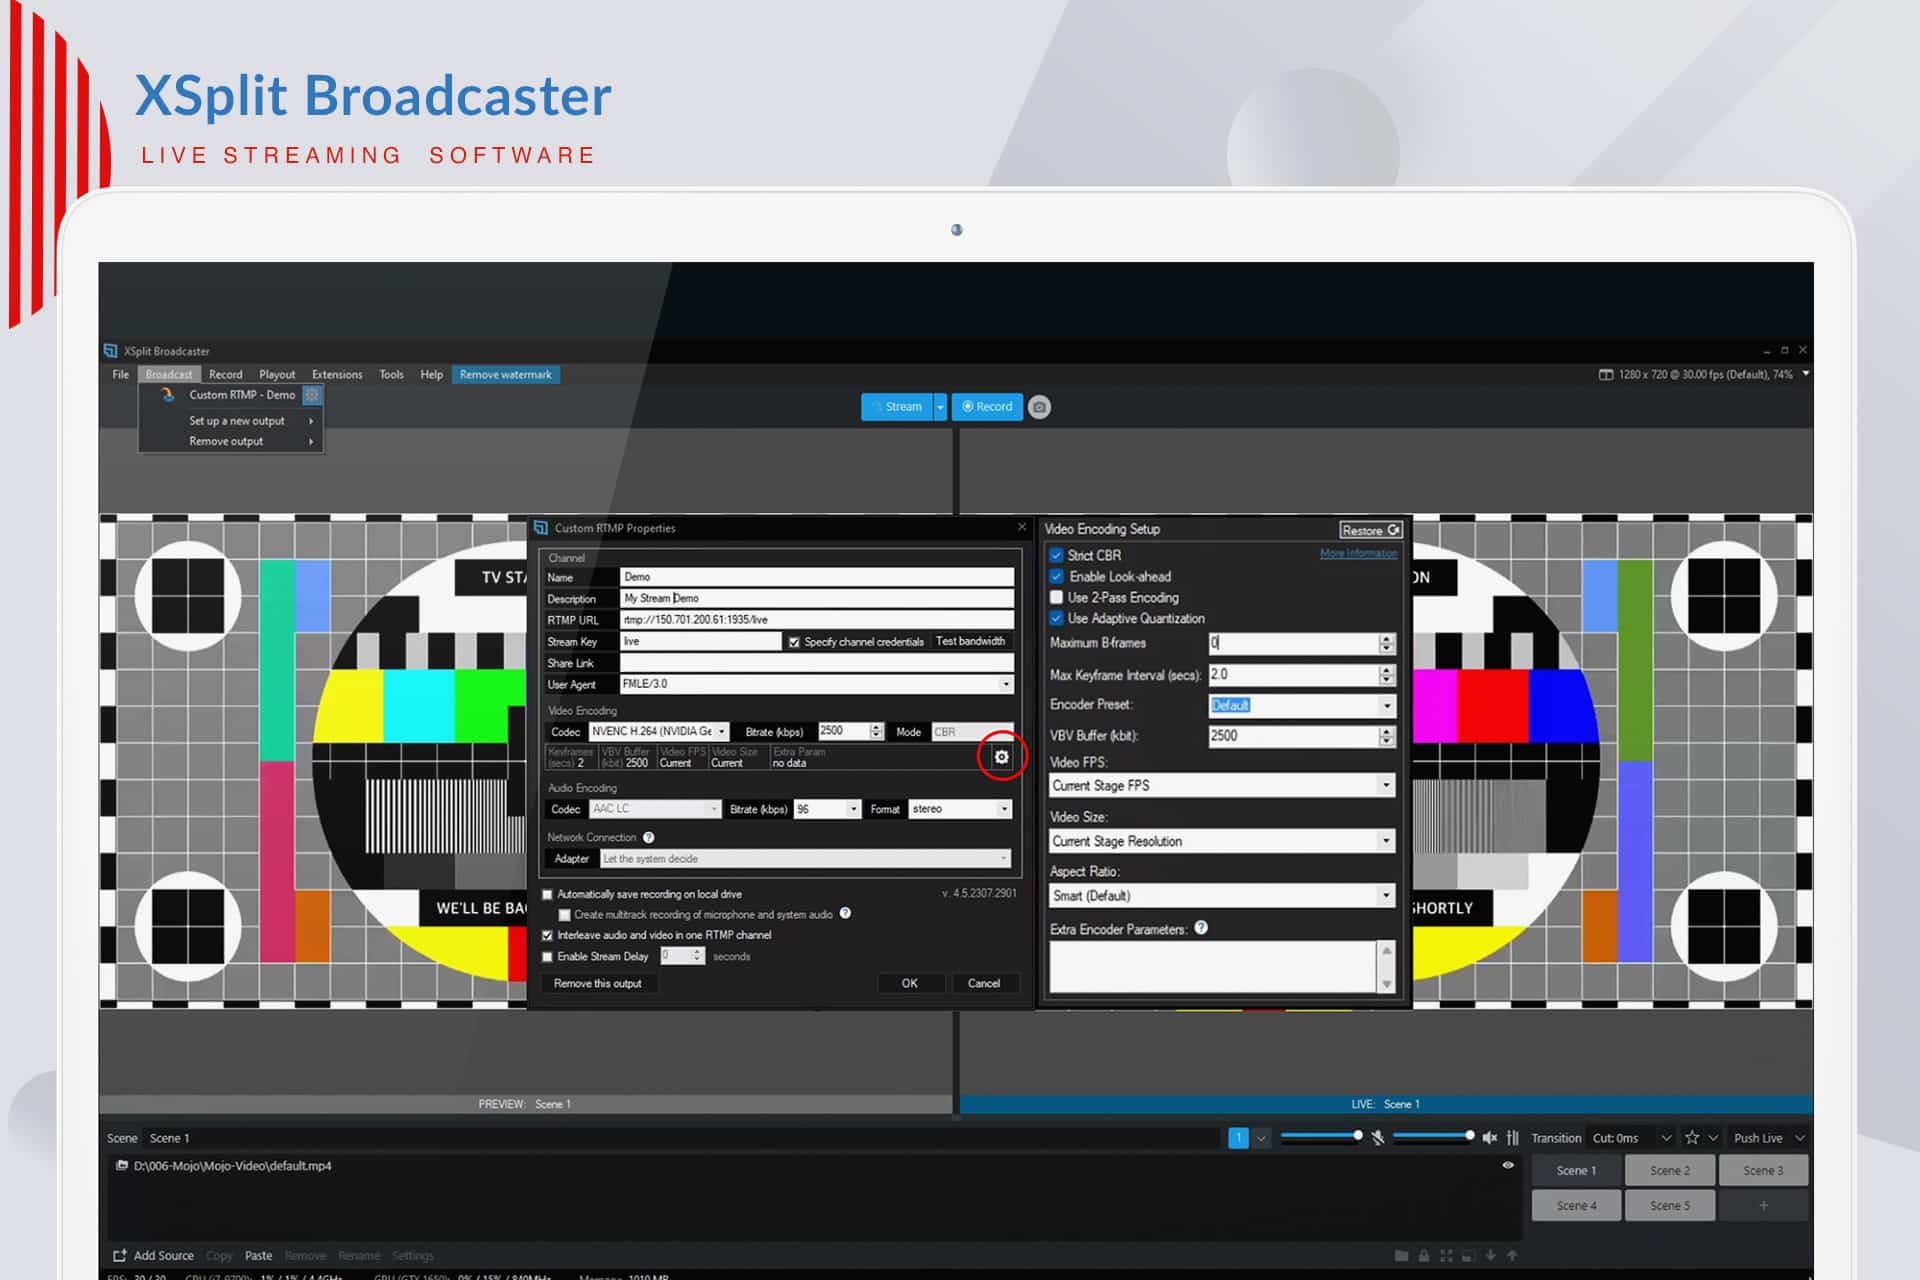
Launch XSplit Broadcaster and navigate to "Broadcast." Click on the Custom RTMP output you've created. Copy and paste the RTMP URL and Stream Name Key from your MojoCP account into XSplit Broadcaster.
Step 5:
Assign a name to your Custom RTMP broadcast output (e.g., My Live Streaming).
Step 6:
Set a description for your livestream and archived video.
Step 7:
Configuring the RTMP URL as rtmp://111.222.333:1935/live.
Step 8:
Specify the Stream Key credentials, login credentials for the channel, and optionally set a shareable custom URL for your livestream.
Step 9:
The User Agent is set to FMLE/3.0 by default.
Step 10:
Once satisfied with these settings, click “STREAM” at the top center of your XSplit Broadcaster to initiate streaming. To preview your stream, return to your MojoCP account and access the “Preview” section.[Download Xsplit Broadcaster]
- Streaming Pulse Inc.
Click to zoom in on the image
XSplit
XSplit Broadcaster not only excels in live streaming and broadcasting but also extends its capabilities beyond these realms. This versatile software empowers you to capture on-demand video content effortlessly. With advanced features such as precise audio volume management and the ability to seamlessly switch between multiple scenes, XSplit Broadcaster elevates your content creation, ensuring an engaging and dynamic viewer experience.
Quick Video Tutorial
Explore our step-by-step video tutorial on setting up XSplit Broadcaster. Follow along with ease to ensure a seamless and professional streaming experience.