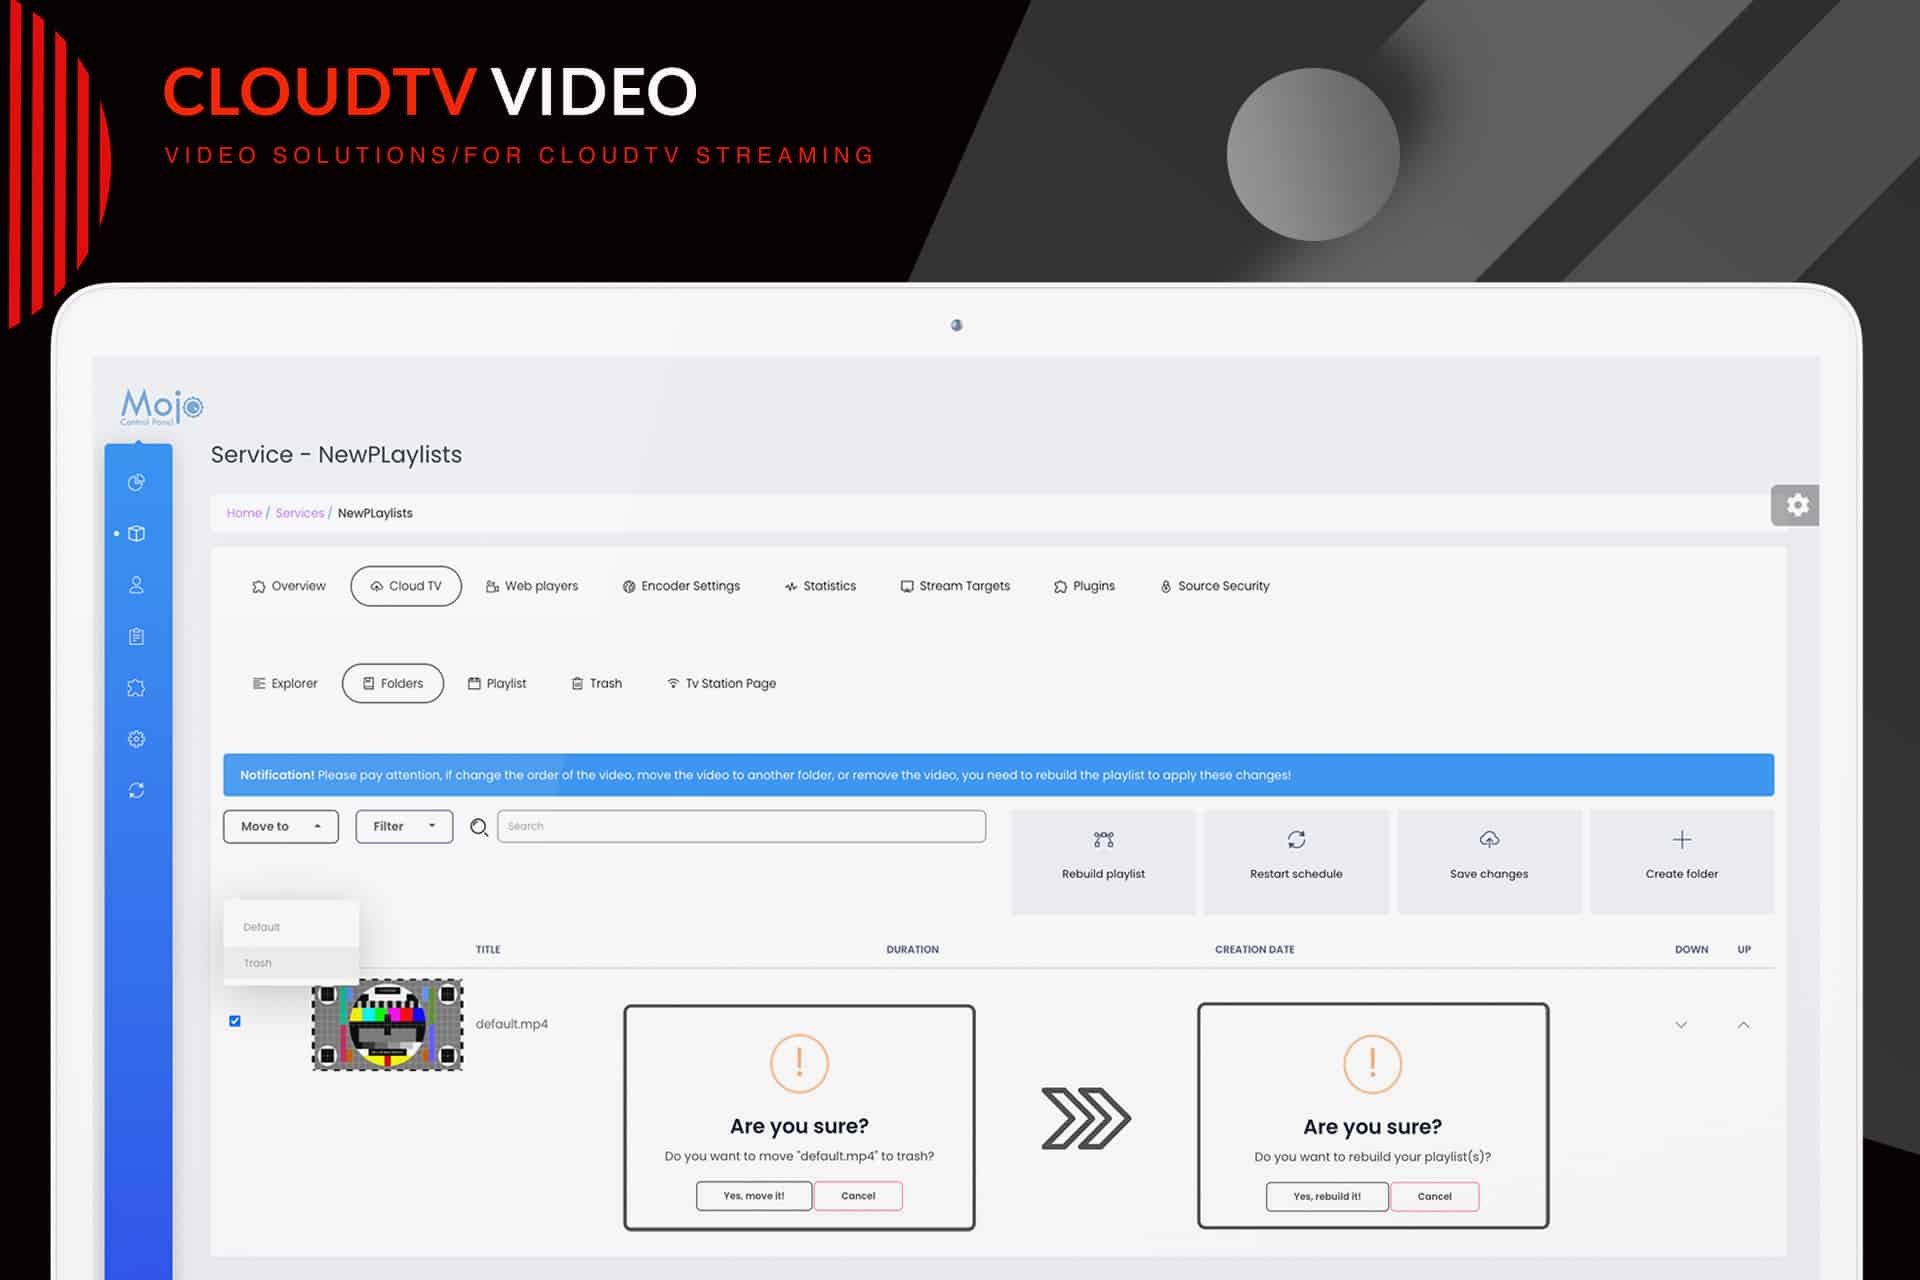
Trash & Restore Videos
Enhance your video management by using the Trash & Restore feature. This tool allows you to effortlessly organize your videos by temporarily storing those you no longer need in a designated trash folder. If you decide to recover a trashed file, simply click the ‘Restore’ button for quick recovery. Remember that permanently deleting a video means you cannot retrieve it, so use this feature wisely to avoid losing important content.
This intuitive tool not only keeps your video library organized but also ensures a smooth workflow in managing your content. By utilizing the Trash & Restore feature, you streamline your video management process, making it easier to curate and maintain your collection without the fear of losing valuable files. Embrace the efficiency of this feature to keep your video library in top shape!
Click to zoom in on the image
Effortlessly manage your video content with the Trash & Restore feature.
Manage your video content effortlessly with the Trash & Restore feature. This functionality allows you to streamline your organization by temporarily storing videos in the trash while you refine your library or safeguard against accidental deletions. When you need to restore trashed files, simply click the button for an easy recovery.
However, keep in mind that permanently deleted videos cannot be recovered, so use this intuitive tool wisely. This feature enhances your content management workflow, enabling you to organize your video collection with confidence. Additionally, you won’t face interruptions to your current playlist, as restarting the schedule through MojoCP seamlessly integrates changes without disrupting ongoing playback. Enjoy the peace of mind that comes with knowing you have a reliable method for managing and restoring your video content effectively!
*(Rebuilding the playlist for On-Demand is not required.)
Delete & Restore Permanently:
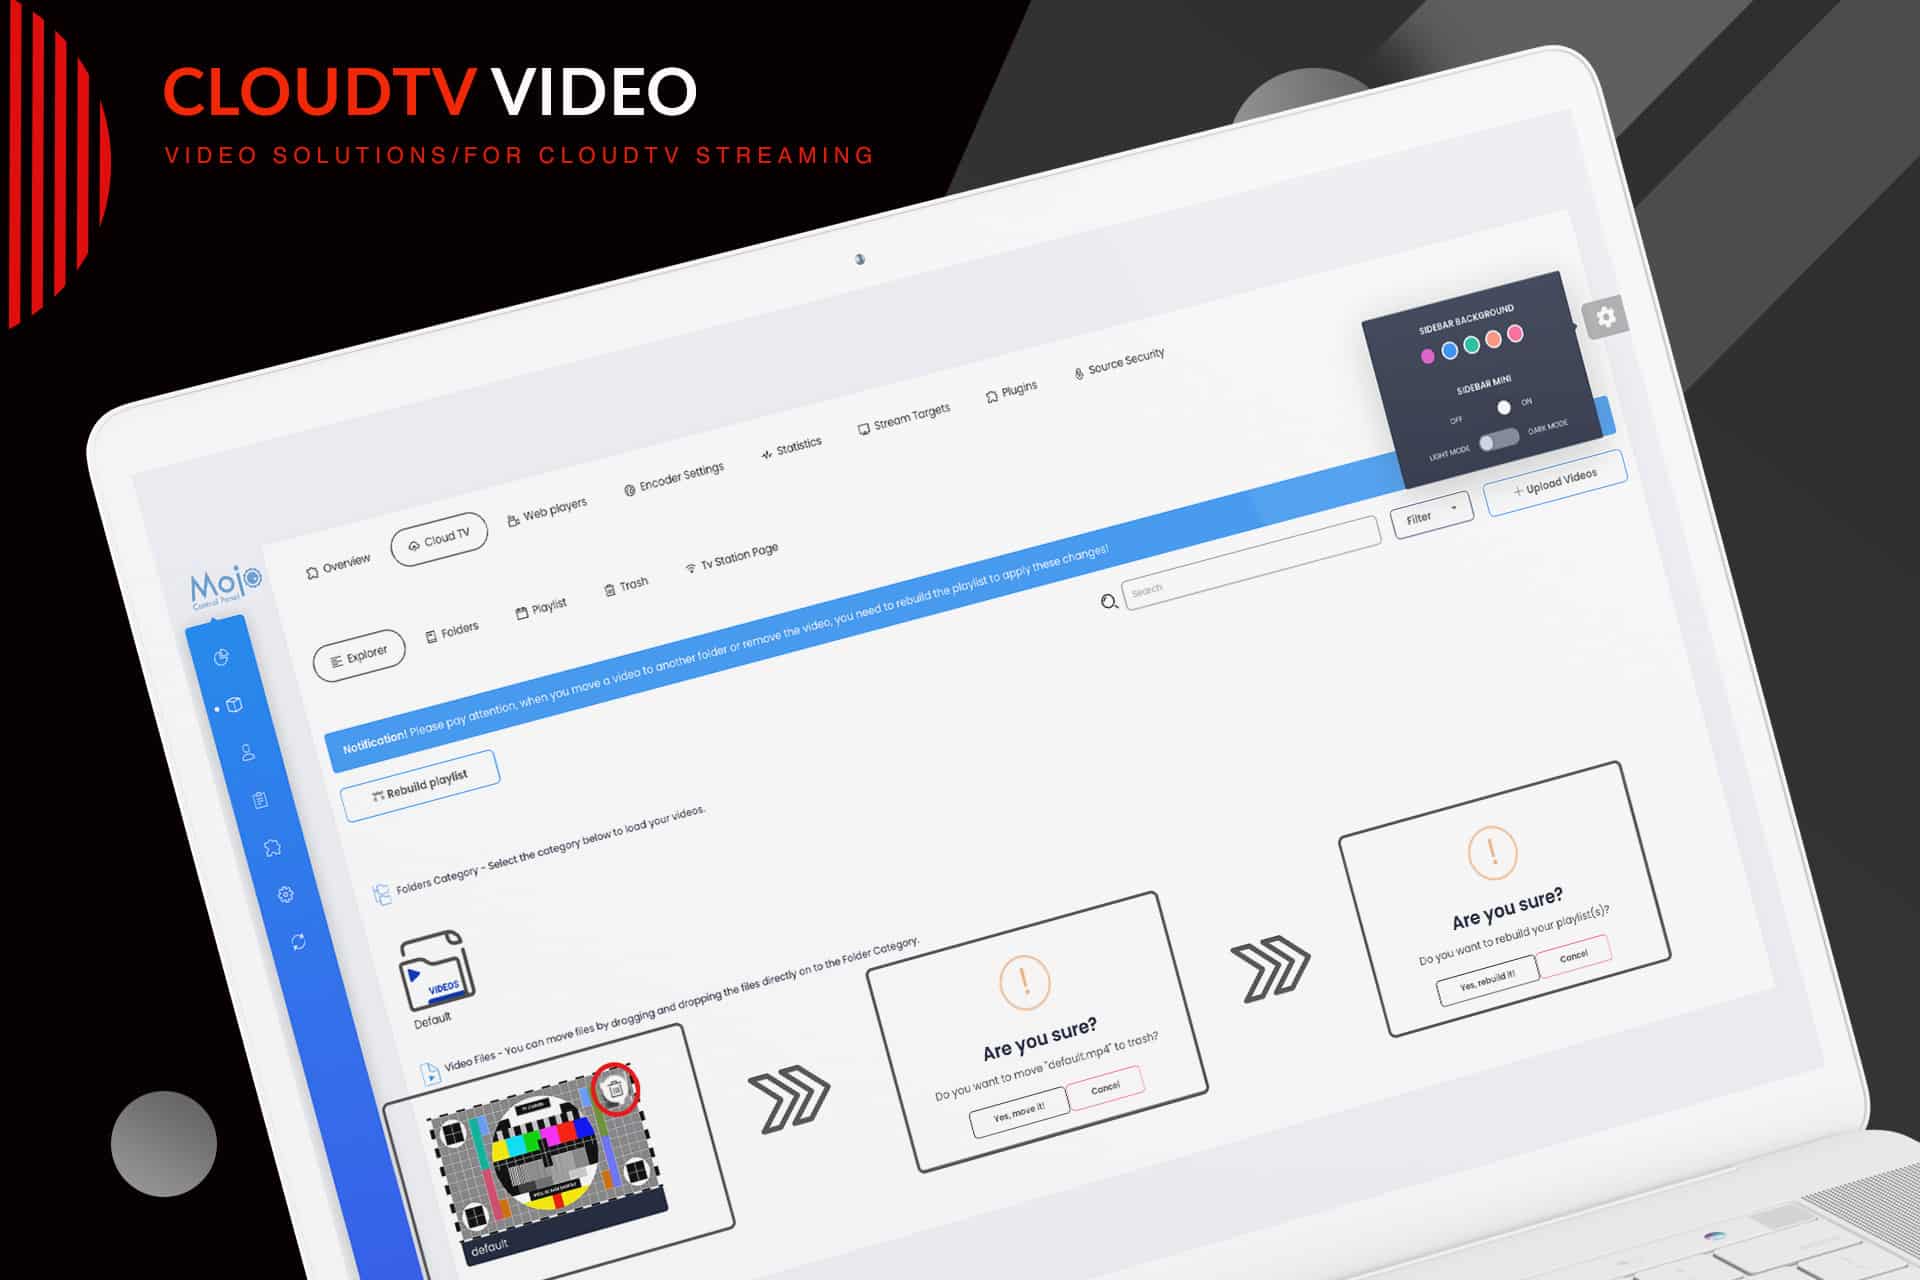
You have two options for deleting your video files. Firstly, you can navigate to the Explore tab and click on the small trash icon displayed on the video file. Alternatively, you can head to the Folder Tab, enabling you to delete multiple files simultaneously. Choose the method that best suits your convenience and workflow.
Explore Tab Option 1:
Step 1
From your dashboard, click on services and select your server. server.
Step 2
From your overview page, click on the Cloud TV / On-demand Tab, and the Explore Tab.
Step 3
Select the video file you wish to remove by navigating to the relevant category folder.
Step 4
Click on the small trash icon displayed on the video file.
Step 5
Confirm your decision to move the video to the Trash folder.
Step 6
Rebuild the playlist to apply the changes. *(Rebuilding the playlist for On-Demand is not required.)
Step 7
To permanently delete or restore a file in case of a mistake, navigate to the Trash Folder.
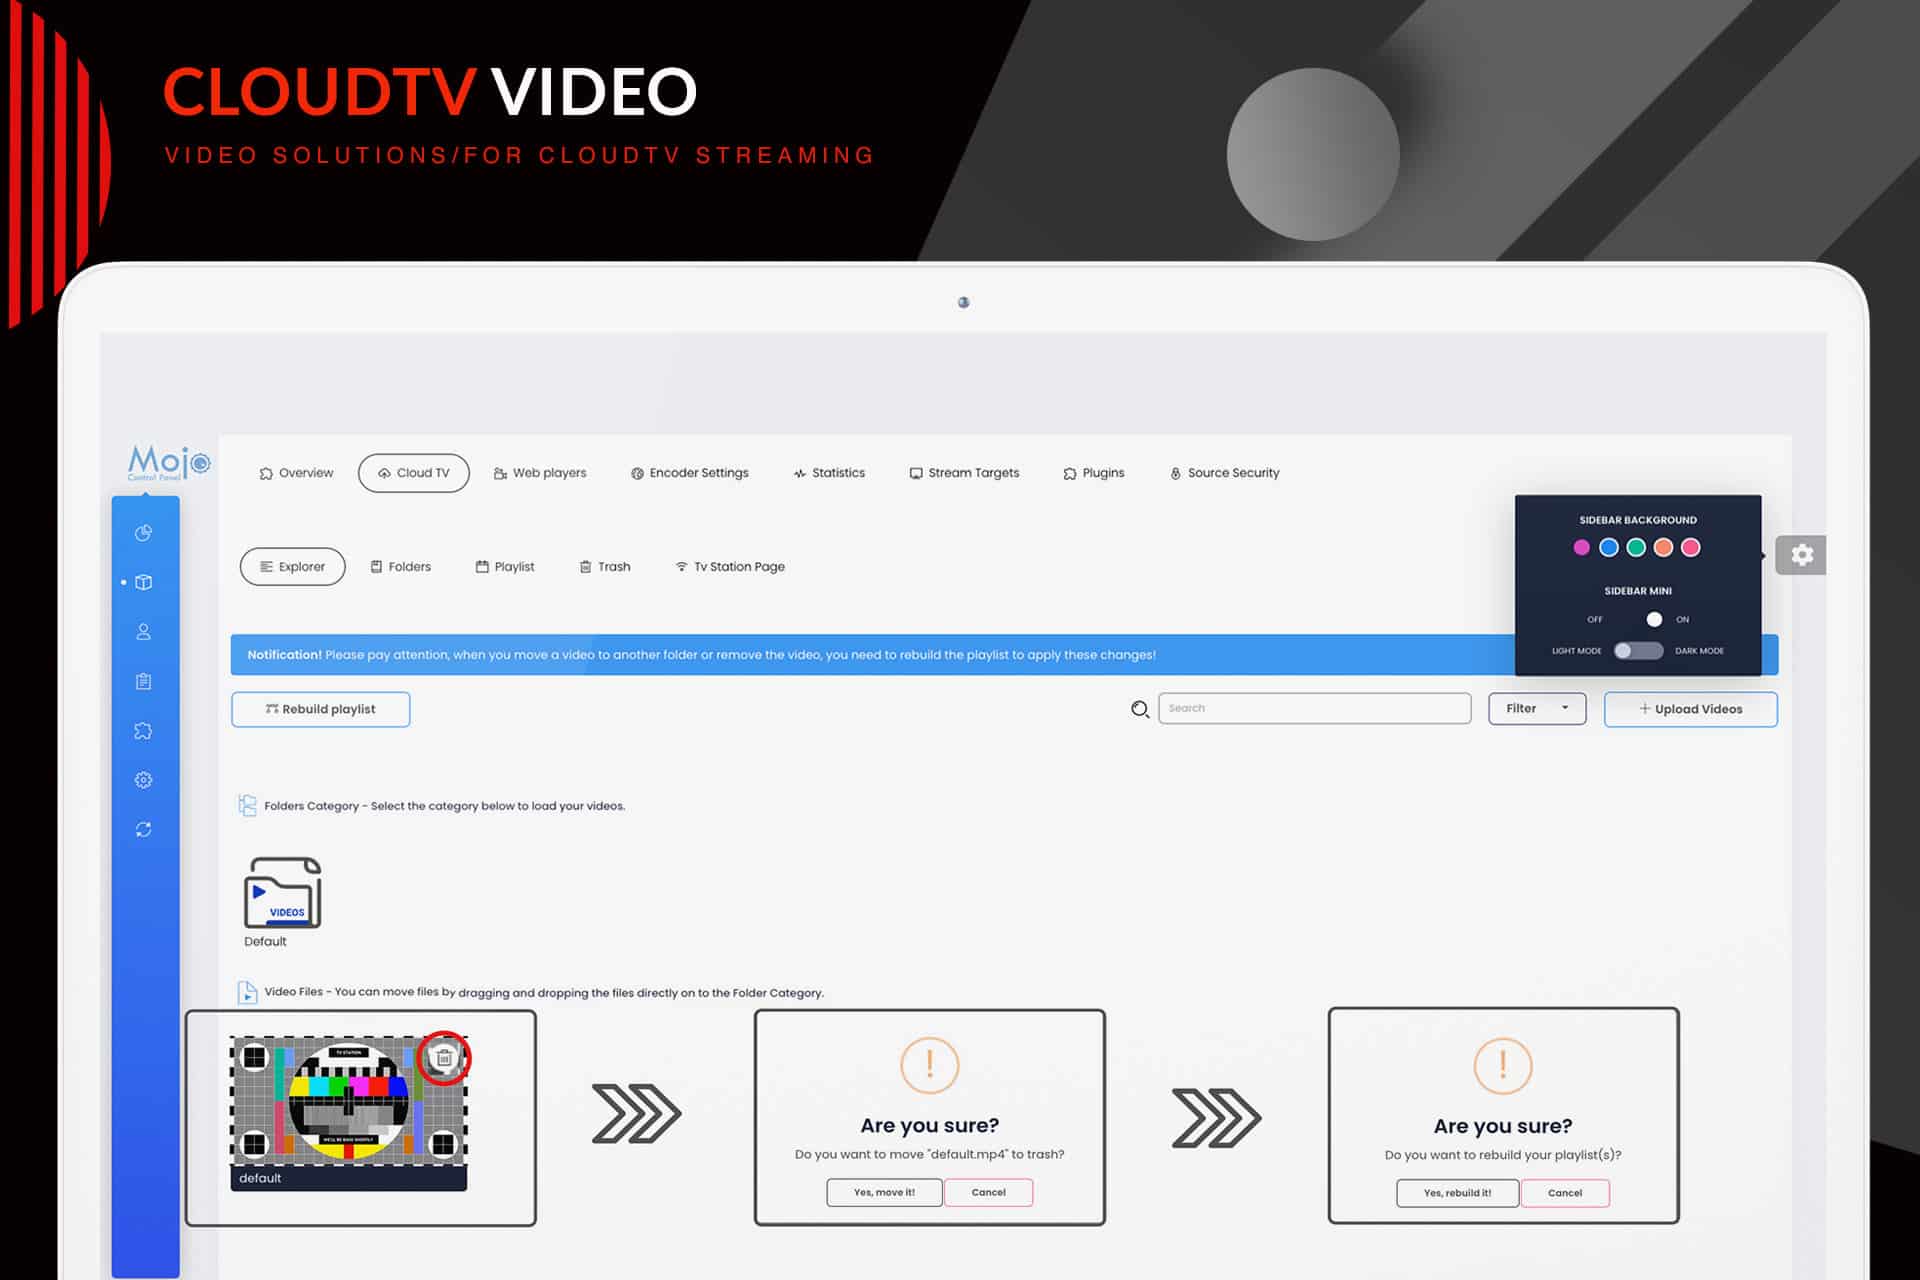
Select the file you wish to restore or delete permanently, then choose the appropriate action – either 'Restore File' or 'Delete Permanently.Folder Tab Option 2:
Step 1
- Streaming Pulse Inc.
From your dashboard, access services and choose your server.
Step 2
On your overview page, navigate to the Cloud TV / On-Demand Tab and the Folders Tab.
Step 3
Using the Drop-Down menu Filter, opt for the category folder.
Step 4
Identify the video you wish to delete from the list. From the drop-down menu, select the "Trash Folder," and then click save.
Step 5
Proceed to the trash Tab, where you can either "Restore the file" if you mistakenly deleted it or
"Delete Permanently."
Step 6
Upon completion, click on rebuilt and restart schedule to implement the changes.
*(For On-Demand is not required.)
Note: Restarting the playlist will not interrupt the currently playing content.
Trash & Restore feature
Revolutionize the way you handle your video content with the innovative Trash & Restore feature. This powerful tool empowers you to effortlessly manage and organize your video library, providing a seamless and user-friendly experience.
Access our video tutorial
Discover our extensive video tutorial crafted to walk you through the steps of deleting and restoring files. Our tutorial provides a detailed, step-by-step demonstration, empowering you to effortlessly navigate the platform's interface.