CloudTV Station To Live
Elevate your broadcasting experience with our CloudTV Station to Live service, which allows for a seamless transition from pre-recorded shows to live streaming with just a click of a button. Not only does this innovative service enhance viewer engagement, but it also simplifies the broadcasting process, making it accessible for everyone. To facilitate your setup, we provide a comprehensive step-by-step video tutorial that guides you through configuring your TV station using MojoCP and Wowza Streaming Engine, thereby ensuring a smooth and effortless setup process.
Key Features:
Automatic Live Switching:
With our CloudTV Station to Live service, you can effortlessly shift from pre-recorded content to live streaming with a single click. Consequently, this feature provides a dynamic and real-time connection with your audience, enhancing viewer interaction and satisfaction.
Wowza Streaming Engine Integration:
Furthermore, you can harness the power of Wowza Streaming Engine to optimize your TV station for high-performance live streaming. This integration not only enhances the quality of your broadcasts but also ensures reliability, providing your audience with a crisp, clear viewing experience.
24/7 Connectivity:
Moreover, enjoy round-the-clock connectivity with the flexibility to switch seamlessly between pre-recorded shows and live streaming. This capability ensures that your audience has a continuous and engaging viewing experience, regardless of the time of day.
Whether you're new to live streaming or looking to enhance your current setup, our CloudTV Station to Live service tutorial empowers you to create professional and captivating broadcasts. With MojoCP user-friendly platform, going live has never been easier. Therefore, keep your audience engaged with the content they love, all at the click of a button. Elevate your broadcasting today and transform how you connect with your viewers!
RTMP Encoder Settings
Certain online platforms utilize RTMP servers such as Wowza and comparable services. These servers typically require user authentication through your designated username and password.
Generating a Stream File:
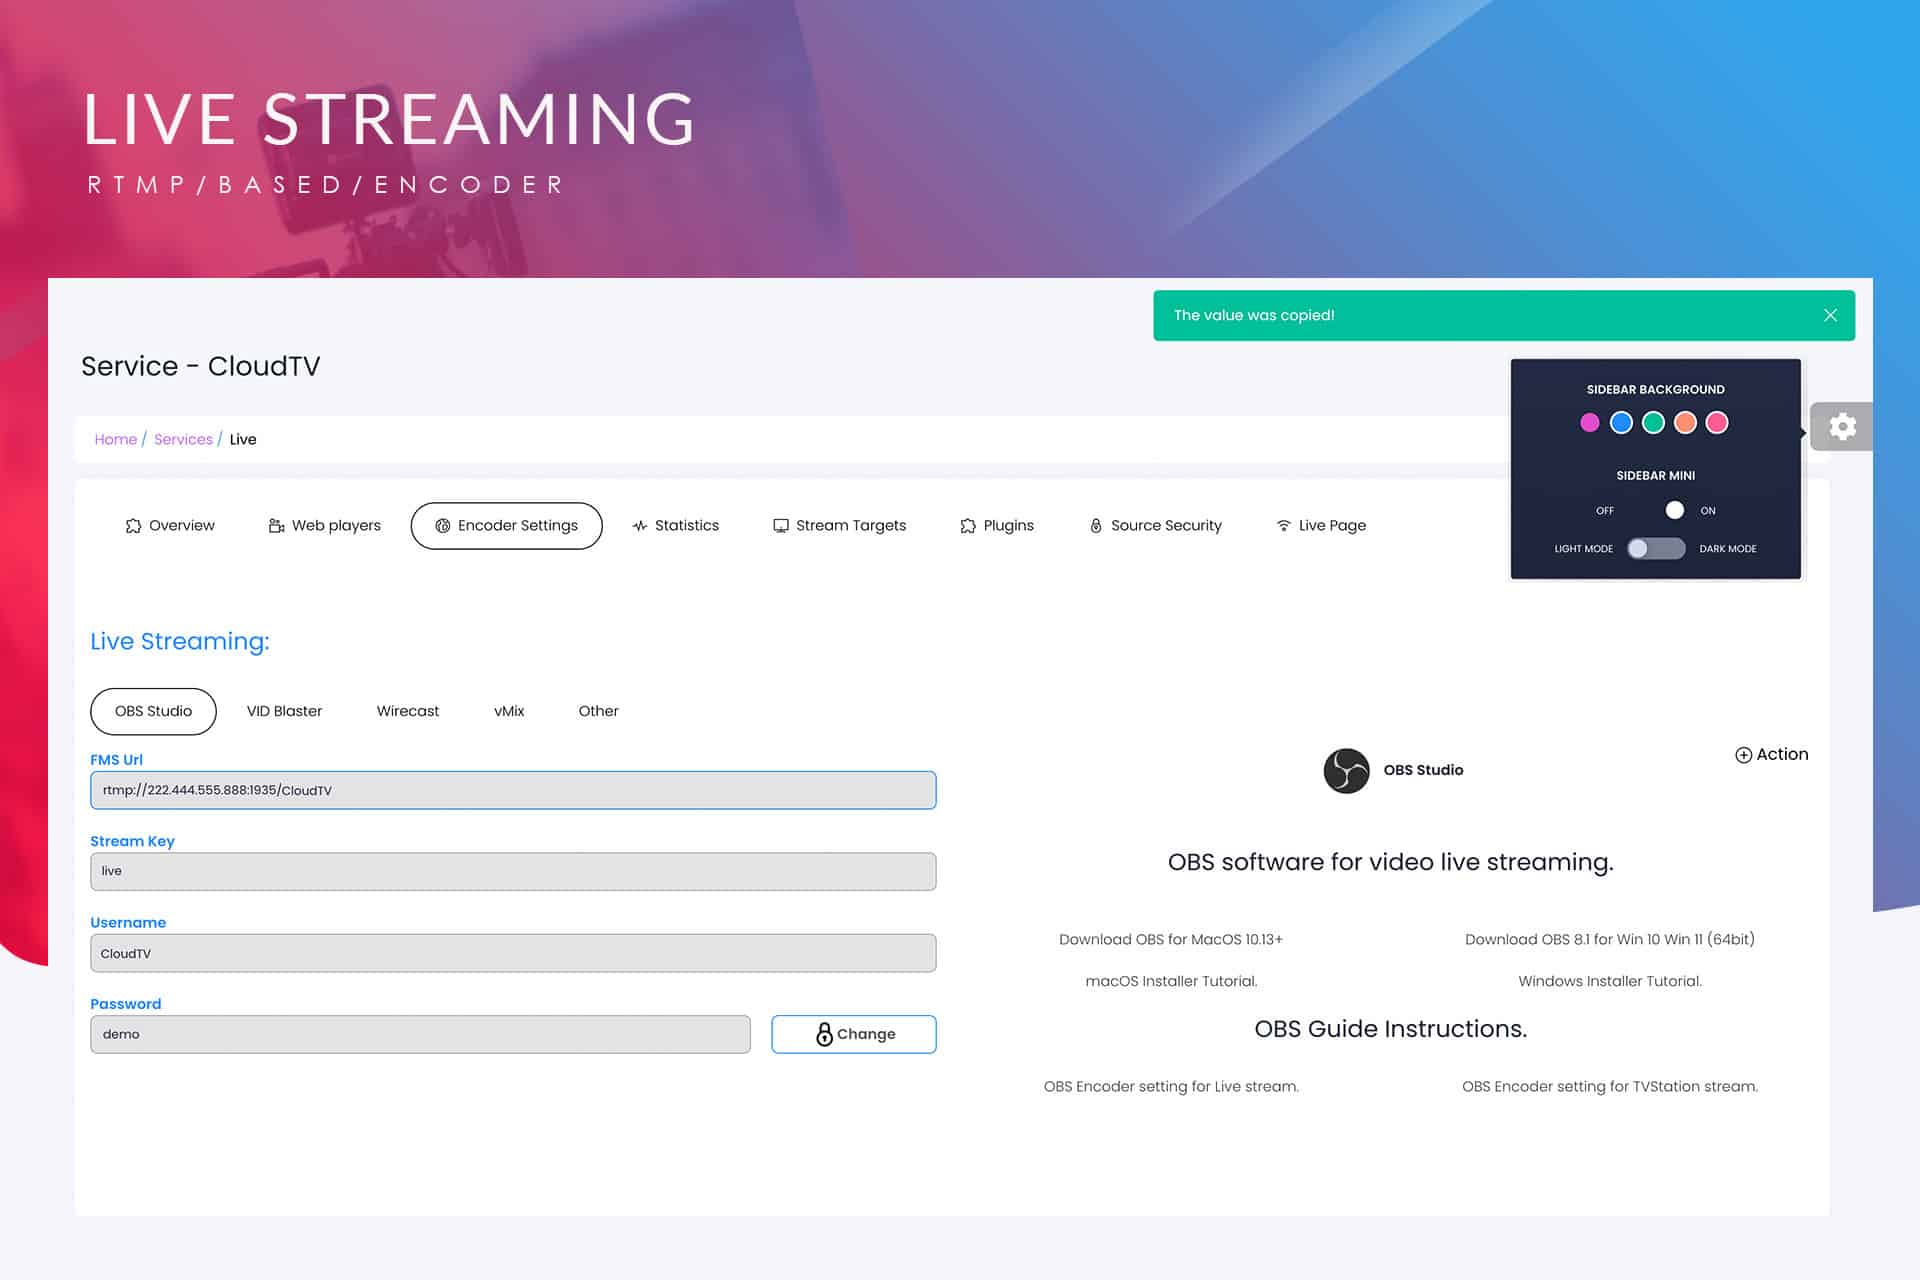
Navigate to the MojoCP dashboard and go to Services > Application name > Encoder Settings.
There are various encoder settings available for your live streaming, including options for software like OBS, VID Blaster, Wirecast, vMix, and also configurations optimized for streaming live content from mobile devices. (Let's illustrate this with OBS as our example.)Open OBS Studio and from Mojocp copy and paste the information found in the Live Streaming box under the "Encoder Settings Tab" to your encoder.
It will resemble something similar to the following.
- FMS URL: rtmp://222.444.555.888:1935/cloudtv
- Stream Key: live
- Username: cloudtv
- Password: demo
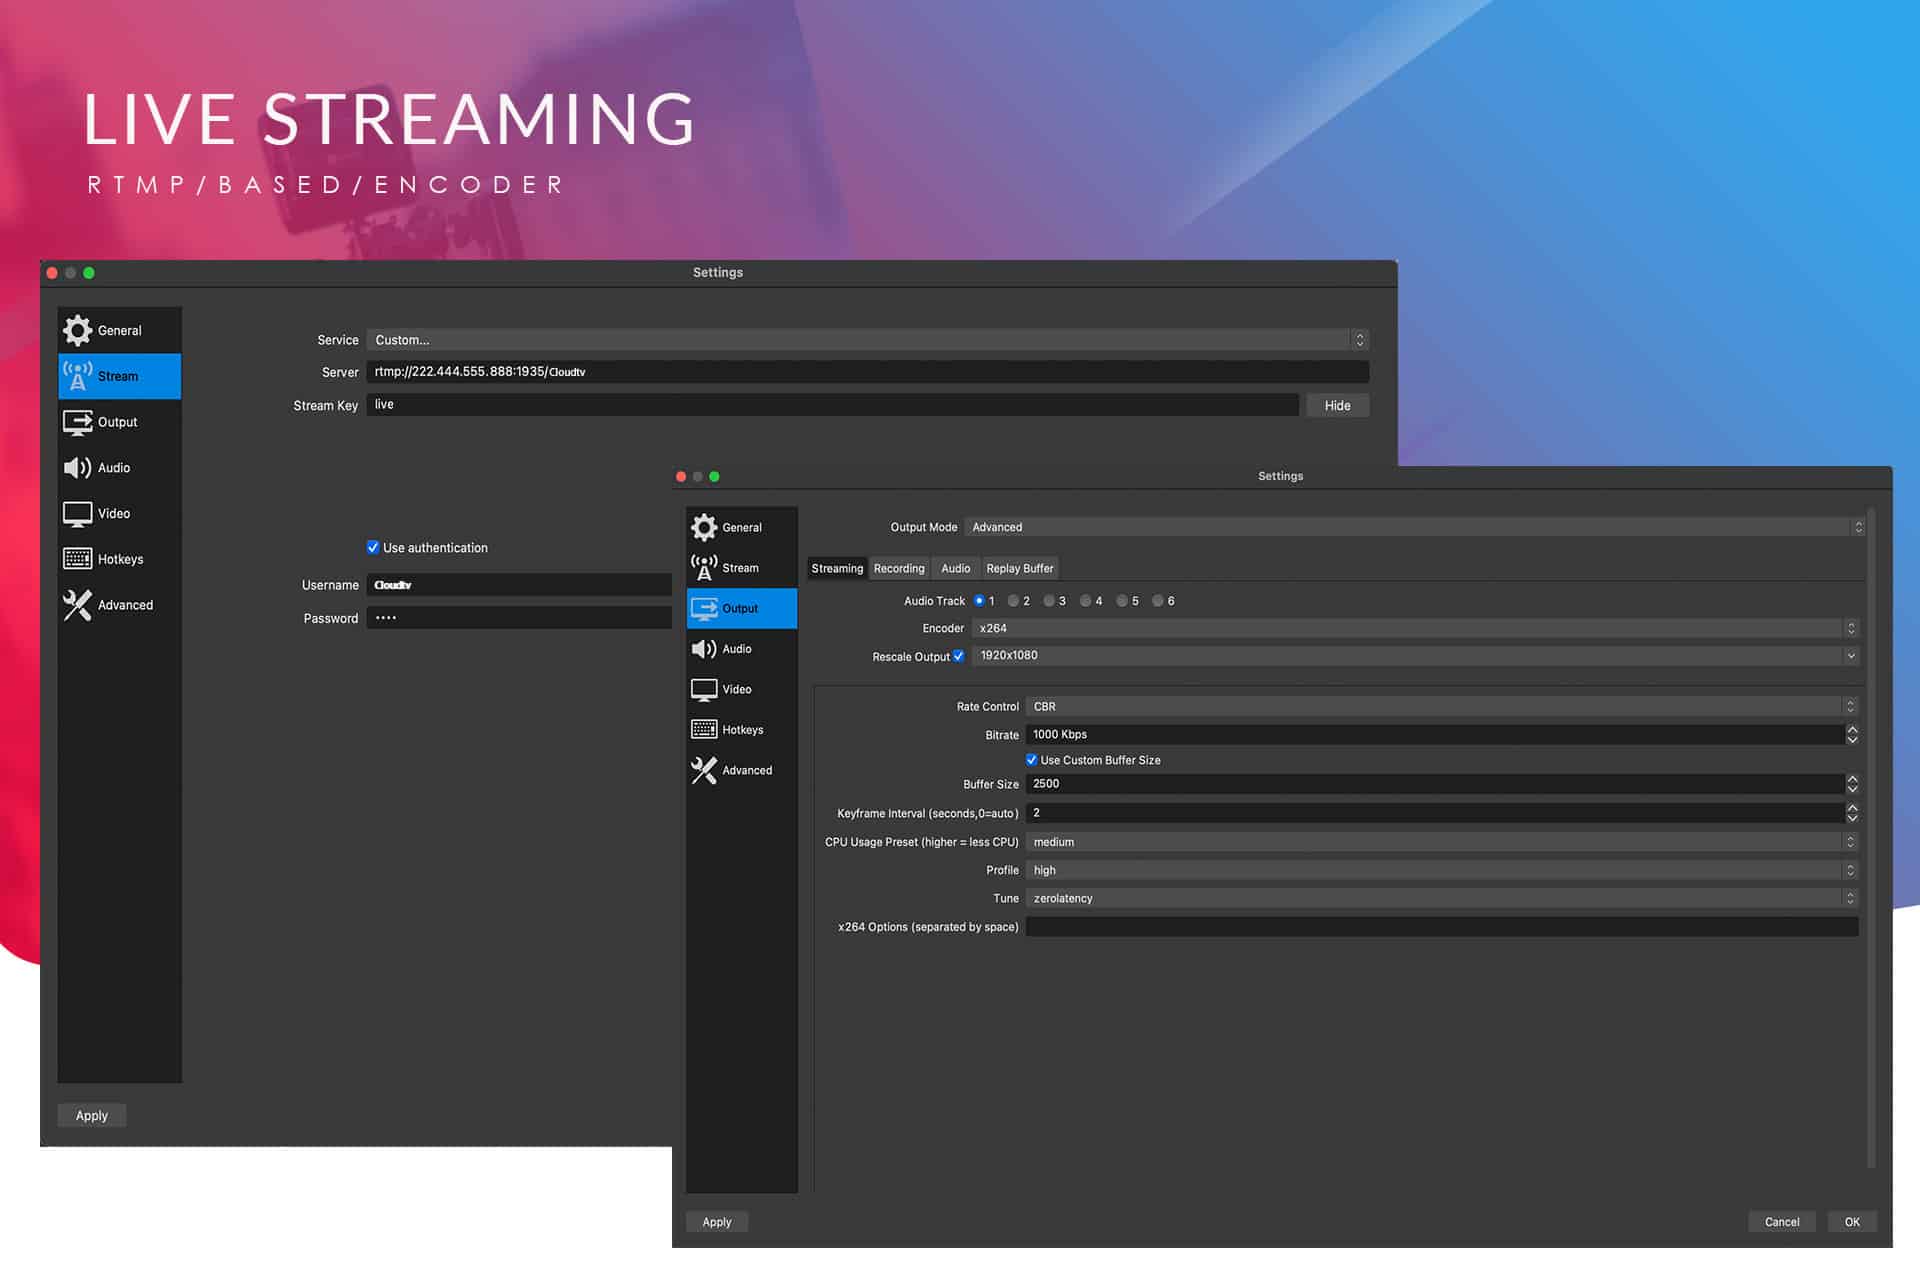
In OBS, navigate to 'Output' located on your left screen:
- Output mode: Select 'Advanced.'
- Encoder: Choose 'x264.'
- Rate Control: Set to 'CBR.'
- Bitrate: Adjust this based on your stream plan; you can also find this information on the Overview page in MojoCP.
- Buffering: Set to '2500.'
- Keyframe Interval: Optimal settings range from 1 to 2.
- CPU Usage: Set to 'Medium.'
- Profile: Select 'High.'
- Tune: Choose 'Zerolatency.'
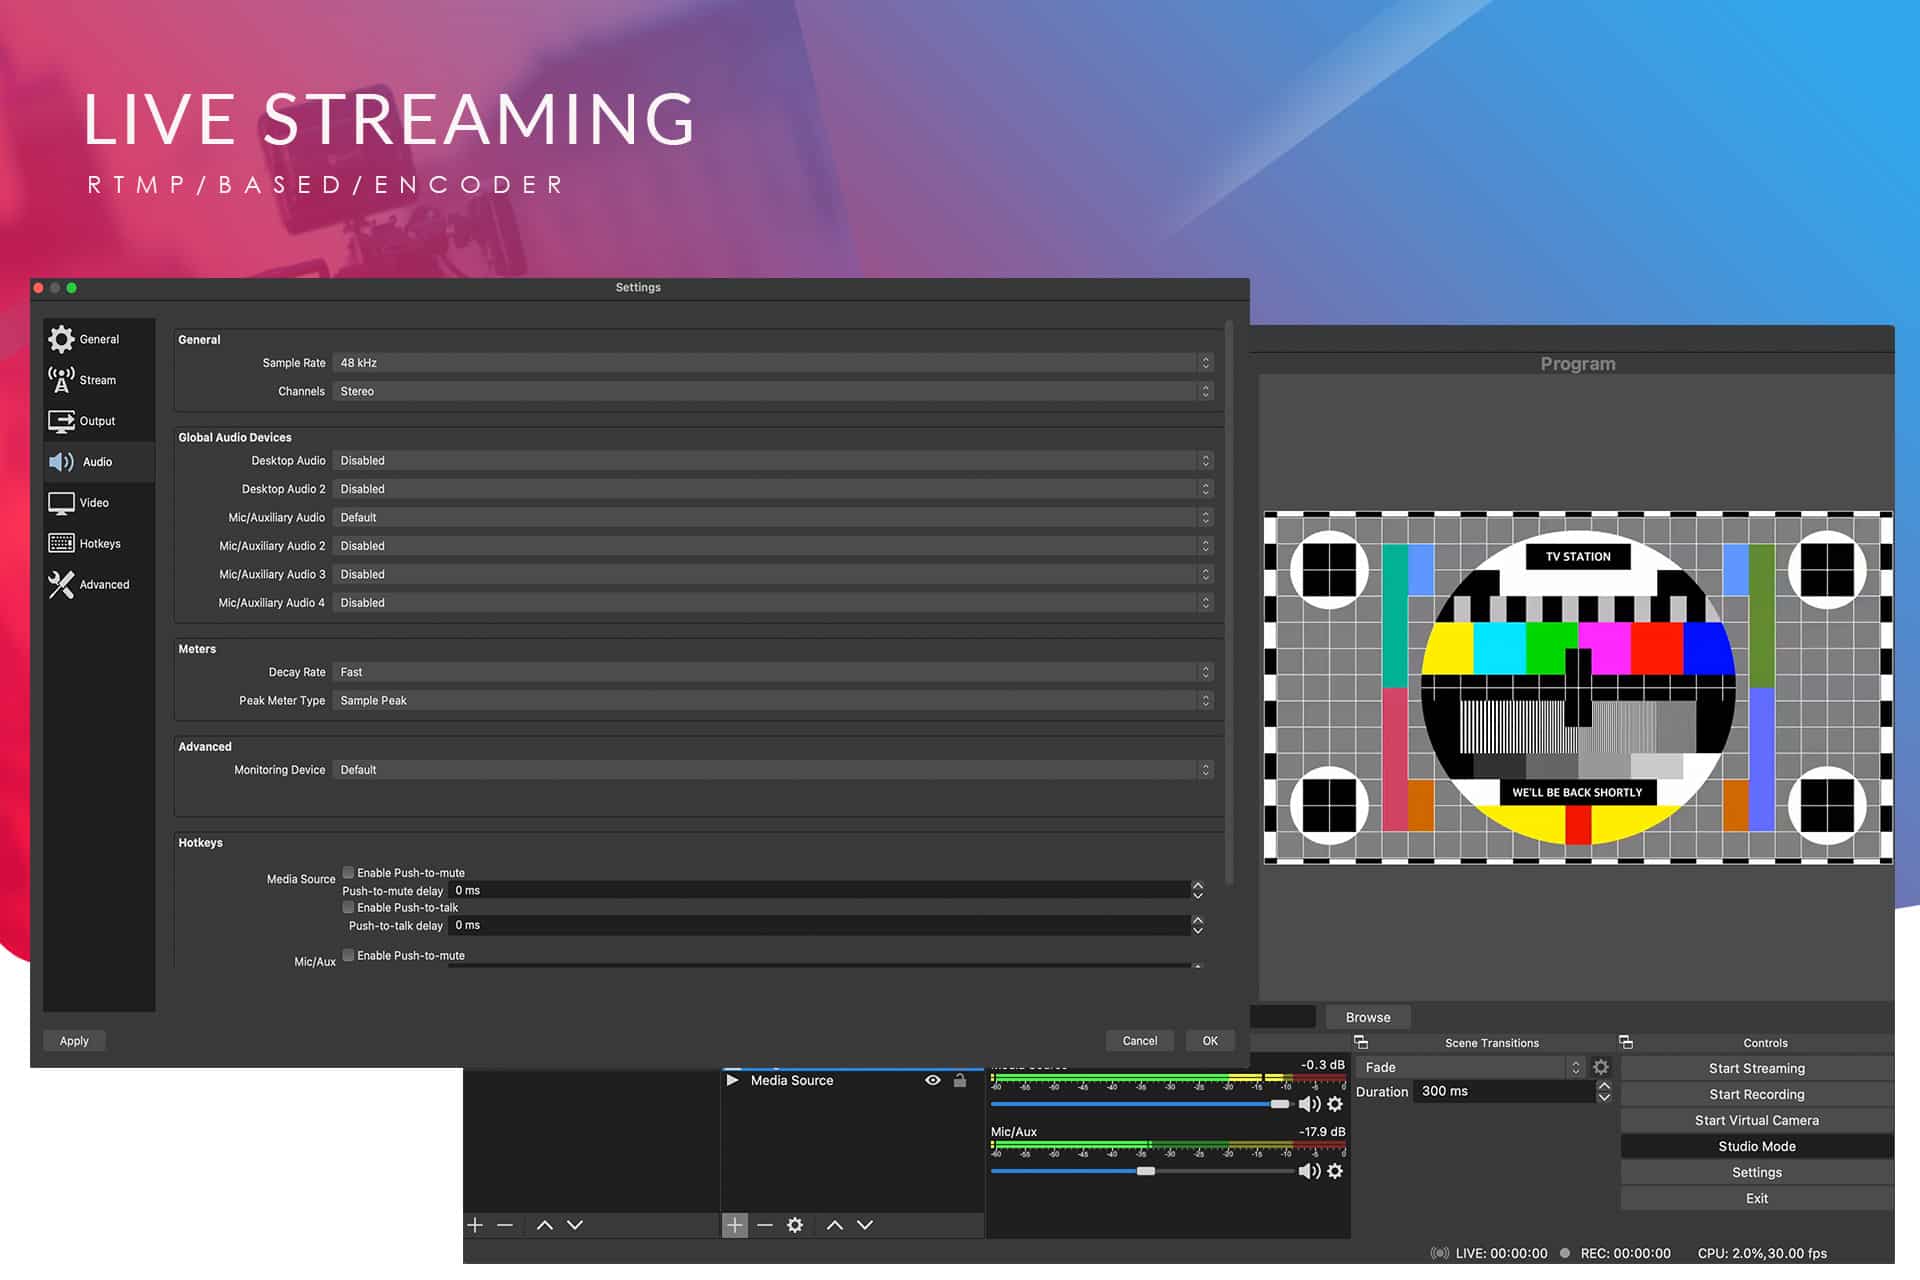
Next, move to the 'Audio' tab in OBS under 'General' and configure as follows:
- Sample Rate: Set to '48 kHz.'
- Channels: Choose 'Stereo.'
Click 'Apply' and then 'OK' to save the changes. You're now prepared to commence YOUR live streaming by clicking 'Start Streaming' in OBS."
*Please consult the accompanying screenshot for reference.
- Streaming Pulse Inc.
Click to zoom in on the image
Download OBS Studio
Free and open source software for video recording and live streaming.
- Windows 10 and 11: Download Installer
- macOS 11.0 : Installer (x86_64/Intel)
- Ubuntu 20.04 and newer: obsproject
- Linux Manual Install: Setup Guide
Quick-Reference Guide
Discover the Power of Open Broadcaster Software (OBS) Studio: Learn How to Create RTMP-Based Live Video Streams.